Strontium Dog Miniatures Game - Outlaw Team Tactics

Following on from the S/D Agents teams post, it's time for a look at some Outlaw bands for the Strontium Dog Miniatures Game. I've set this out with notes on how to make best use of your band, suggestions on alternatives for the band and also how you can add to the band to increase it to 60 Notoriety (this being the amount of Notoriety I personally prefer to spend for scenarios).


The Bubba Gang:
Max Bubba                               18 Notoriety
Impetigo Jones                           6 Notoriety
Brute Mosley                              6 Notoriety
Low-Down O'Phee                     5 Notoriety
Skull                                           5 Notoriety
Kansyr                                      10 Notoriety
Total: 50 Notoriety

Notes: I'd be surprised if any player hadn't tried out the Bubba Gang at some point because they are the gang featured in the game scenarios. Kansyr usually costs 11 Notoriety, but since Bubba is the leader with a similar ability to have an extra Chicanery Card if he is leader, it essentially means that Kansyr's No Cure is nullified, therefore his cost is legitimately reduced by 1. Bubba is best used by camping from afar and using the blazooka to rain all hell down upon the enemy band. His gang should be regarded as meat shields for Max and Kansyr. In general, the gang is best kept at long range to play to their strengths. Remember that Low-Down and Skull's long range is 24" as per the errata post. Keep those two close by Max to protect him with his What The Sneck? ability. Kansyr should sit out of sight using his Mind Warp to try to have enemy models turn on each other! This gang is incredibly cowardly but it fits perfectly with their characters as portrayed in the strip!
Options: Stix is really the only option (instead of Kansyr) available to bring the band to a round 50. Note that it is perfectly legal to use Stix even though they are S/D Agents as Stix will team up with virtually anyone! A Stix may be more engaging and enjoyable to play than Kansyr who can be a fairly passive character when played to his strengths. Another option would be to replace Kansyr with two Howlers. This would take you 2 Notoriety over the 50, but most reasonable opponents would allow you to do so.
60 Point List: As with the core list, adding a few Howlers or a Stix would provide a good boost to the band.


Most Wanted:
Max Bubba                               18 Notoriety
Billy Joe                                   16 Notoriety
Steelkreeg                                 15 Notoriety
Total: 49 Notoriety

Notes: This is a tricky band to use because there are so many points wrapped up in only three characters. Much like the S/D band "Doghouse's Finest" on the previous post, this crew will live or die by success or failure in attempting to return Star Chips to the bag. Remember to be very wary that enemies may attempt to use Time Bombs against Steelkreeg which he will struggle to Evade (remember every model gets +1 Evade when a blast weapon is used against them)! Assuming things do go your way, Bubba and Steelkreeg's heavy weaponry will weaken enemies for Billy Joe to deliver the coup-de-grace with his famous dual las-whips!
Options: Because Steelkreeg is so vulnerable to attack, it may be an idea to drop him in favour of two Bad Boys.
60 Point List: Add Kansyr or 2 Howlers to the band.


The Fur and the Fury:
Kansyr                                       11 Notoriety
Bubo                                          14 Notoriety
2 x Bad Boys                             14 Notoriety
2 x Howlers                               12 Notoriety
Total: 51 Notoriety

Notes: I've always thought that the Bad Boys and the Howlers bear more than a passing resemblance to each other so I usually think of them as all being part of the same species or clan. For that reason I thought it might be fun to have a fur-list. Kansyr does his mind control business with two Howlers to provide him long range cover with those 24" range Stormers, allowing Bubo and the Bad Boys to run riot in search of close-quarters combat!
Options: You could swap Bubo for Darkus but that weakens the band as Bubo's skill in sending Bad Boys chips back to the bag is a great one. Equally, two Bad Boys are better than one Darkus in my book.
60 Point List: Add Darkus but play him as another Howler for 6 Notoriety and throw in a kidnapped Gronk who is forced into serving the gang for 3 Notoriety. Alternatively, you could break from the "furry" theme and add Skull and Low-Down O'Phee to the band.


Dirty Tricks Crew:
Max Bubba                                18 Notoriety
Steelkreeg                                  15 Notoriety
Kansyr                                       11 Notoriety
Impetigo Jones                           6 Notoriety
Total: 50 Notoriety

Notes: With this motley crew you will start the game with an extra Chicanery Card, your opponent starts with one less than they usually would and you have Kansyr using Mind Control to turn enemies against each other!
Options: There aren't many options if you stick with the core three characters who use their abilities for underhand gain as set out above; really all you could do would be swap Impetigo Jones for Brute or a Howler.
60 Point List: Add Low-Down O'Phee and Skull to swell the numbers (cannon-fodder to cover Bubba in particular).


Lowest of the Low:
Kansyr                                       11 Notoriety
Impetigo Jones                           6 Notoriety
Brute Mosley                              6 Notoriety
Bad Boys x 2                             14 Notoriety
Howlers x 2                               12 Notoriety
Total: 49 Notoriety

Notes: This list is optimised to bring the largest Outlaw group possible to the table. You can expect to suffer a lot of casualties by fielding only one character with a Cool of 4 but if the opponent isn't fortunate with their Star Chips, your strength in numbers will count big time!
Options: You could bring Low-Down and Skull to the band at the expense of others, but you do (on paper) have the optimal band for numbers set out above. What is good about Skull and Low-Down is their excellent range and good Resist so they are solid for defence so I do think they are worth considering depending on the Scenario you are playing.
60 Point List: Add Low-Down O'Phee and Skull to the band. Alternatively, you could play them in place of Impetigo and Brute - and bring Bubo into the ranks as his ability could greatly assist the Bad Boys for 61 Notoriety...


What are your favourite outlaw bands? Comments welcomed!


Read the graphic novels! Available now from the 2000AD online store!

Strontium Dog Miniatures Game - S/D Agents Team Tactics

Since the Strontium Dog Miniatures Game tactics guides have come to an end with all of the characters reviewed on an individual basis, I thought it might be fun to put some band lists together. On this post I'll look at bands for S/D Agents with notes on how to make best use of your band, suggestions on alternatives for the band and also how you can add to the band to increase it to 60 Notoriety (this being the amount of Notoriety I find most satisfying to play).


Doghouse's Finest
Johnny Alpha (Hero Mode) 19 Notoriety
Wulf Sternhammer               15 Notoriety
Middenface McNulty           13 Notoriety
The Gronk                              3 Notoriety

Notes: This has to be every fan's go-to list at as they are the characters who feature most prominently in the 2000AD Strontium Dog strip. They have opposite strengths but thanks to the "Look Out Johnny!" rule for Wulf, it's no bad thing to keep Johnny in close proximity to his partner; his higher Resist stat and Berserker ability allow him to take far more punishment than Johnny. Don't treat Wulf as mere cannon fodder though, he is absolutely devastating in close combat and can cut through weaker enemies quickly and without fuss. The same too applies to Middenface so this force are best when used offensively. Keep the Gronk somewhere out of sight, but preferably somewhere not too far away from the action i.e. in cover. When the battle starts taking its toll on the heroes, they can retreat to the Gronk's sanctuary to get patched up. The Gronk aside, all of these characters have Star Chips so with a little luck, this crew can really run riot! This is a double-edged sword though, you can just as easily fail to send chips to the bag and find yourself outgunned by an opponent with a large number of weaker enemies.
Options: Drop The Gronk from the list and play Johnny as a highly effective coward for 22 Notoriety by keeping him out of sight, maximising use of his Johnny Weird Eyes Ability and Variable Blaster to reduce those cover modifiers. You could also swap Middenface for Durham Red for more defensive play as she is excellent for ranged combat.
60 Point List: Lose the Gronk and add Durham Red for the ultimate dream team!


Hiss and Stix
Hiss Weerd                          10 Notoriety
4 x Stix                                40 Notoriety

Notes: Hiss is a useful leader as his Schemer ability provides the band with an extra Chicanery Card. Hold him back while the Stix close in wreak mayhem in enemy ranks with the Intimidation ability! With the Stix being well-equipped to suffer damage, Hiss' Double-Crosser rule is less risky if you want to boost your creds in The Pay-Off! Again, all of these characters have Star Chips but in this gang you get a full 5 Star Chips rather than the 3 you enjoy with the Doghouse's Finest! Very powerful!
Options: Drop one Stix in exchange for Cuss and Silent Weerd.
60 Point List: Add another Stix!


Dirty Dogs 
Hiss Weerd                           10 Notoriety
Cuss Weerd                            7 Notoriety
Silent Weerd                          1 Notoriety
Fly's Eyes Wagner                12 Notoriety
Slabhead                                 4 Notoriety
Dervish Dogs                          6 Notoriety
Stix                                        10 Notoriety

Notes: This is list brings a good number of models to the table and still boasts 4 Star Chips, plus an extra Chicanery Card and bonus Armoury Card! This group is best employed at range as that is where the strengths of most of the characters lie. Silent Weerd and Slabhead make good cannon fodder to cover your more powerful characters. Fly's-Eyes Wagner in particular is best kept furthest back as he is so susceptible to becoming Pinned. The Dervish Dogs are utterly deadly if you can get them in amongst the opposition so do not underestimate their usefulness - try to keep them out of harm's way until your opposition is drawn closer then watch them fall like nine pins when the Dervishes go to work!
Options: Lose Slabhead and his Dervish Dogs and replace them with Blubberlips and Kid Knee if you favour the whole force sticking to ranged combat.
60 Point List: Add Blubberlips and Kid Knee to the squad.


Guns and Tricks
Hiss Weerd                           10 Notoriety
Johnny Alpha                       19 Notoriety
Fly's-Eyes Wagner               12 Notoriety
Cuss Weerd                            7 Notoriety
Silent Weerd                           1 Notoriety

Notes: This band is set up purely for ranged combat and will provide you with 4 Star Chips, 4 Chicanery Cards and a whopping 5 Armoury Cards!
Options: Replace Johnny Alpha with 2 Stix; you'll lose one of those extra Armoury Cards but have good firepower, 2 Star Chips for the 1 Johnny has and you'll be able to use Intimidation to tie the enemy in knots! Alternatively, drop Johnny in exchange for 1 Stix plus Slabhead and his Dervish Dogs! Or, again at the cost of losing an Armoury Card, drop Fly's-Eyes for the far more reliable Durham Red! 
60 Point List: Add a Stix or Slabhead and the Dervish Dogs, both are excellent options!


Bare-Knuckle Brawlers
Wulf Sternhammer              15 Notoriety
Middenface McNulty          13 Notoriety
Slabhead                                4 Notoriety
Dervish Dogs                        6 Notoriety
Fly's-Eyes Wagner               12 Notoriety

Notes: Chaaaaaarge! This force is designed for one thing - close combat! Most of your band will engage in all out attack! Slabhead is best employed to provide the Dervish Dogs with a second action. While Fly's-Eyes isn't quite as powerful in close combat compared to the rest, he is still pretty decent but you can easily adjust if you want to use him for shooting support instead. His additional Armoury Card is helpful also. One downside is that you only have 3 Star Chips to go in the bag with this list, and that should be a bit of a concern unless you are facing a large number of weak characters.
Options: You could drop Fly's-Eyes for a Stix and Silent Weerd but this would be at the cost of that extra Armoury Card and would waste 1 point of Notoriety. Silent would be there purely as cannon fodder.
60 Point List: Add a Stix to the team and Pin enemies at the time when the rest of your band are getting into close quarters with the enemy! 


Clearly there are a lot more options available than the 5 bands set out here but hopefully these lists give you some food for thought! Comment below to share your own lists here!


Judge Dredd Roleplaying Game

This arrived today - which can only mean one thing, more reading and less writing! First impressions are that the rulebook and GM screen are beautifully presented. The Robot Wars is a soft-back book but the presentation on this is great as well!

This will be part of the shape of things to come on the blog as I hope to start running a new RPG group with this in the very near future and document their stories here. I'll post up again soon about what I think about the rules once I've read them. I do have some experience with running D6 systems so I'm hoping that I'll pick this up pretty quickly - we'll see!

Strontium Dog Miniatures Game - Game Tactics Guide

Game Tactics

I've been playing the Strontium Dog Miniatures Game on a fairly regular basis since its release last year and feel that my understanding of the game has developed enough to be able to provide some advice on how to best play the main game. Note that this post does not take into consideration the myriad of Scenarios and Encounters you can play - there's 18 different possibilities - but, instead deals with general gameplay. I'll post my advice in the same order that the rulebook explains the various rules - so it may be handy to have it to hand when working your way through this article!

Before we start, there are people who play the Strontium Dog Miniatures Game who have never read the strip. While there is nothing wrong with this, my advice is that to best enjoy the game you need to get a proper feel for the characters and universe in which the game is set. If I had to boil it down to reading one story before diving into the game, I'd recommend The Killing which appears in the S/D Agency Files 2. All of the books are fantastic so you can't go wrong (unless you start with The Final Solution) but the S/D Agency Files 2, is the indispensable Strontium Dog collection - you can find it and all of the graphic novel collections here on the 2000AD Store

That's the preamble dealt with...on with the tactics!

Johnny Alpha and Wulf Sternhammer by Carlos Ezquerra
Copyright Rebellion 2000AD Ltd
Star Chips: The odds are in your favour if Going for Broke provided you have a current Cool of 4+. This does not mean it is always desirable to to attempt to do so; if you have a character like Steelkreeg whose main armament is a heavy weapon which requires a Double Action to fire, a failure to return a Star Chip to the bag results in a Pinned marker, and a failed Cool test in the following turn will prevent you from firing upon reactivation. Of course, if you are unable to fire on that activation, you could Go For Broke and, if successful, you will still get the opportunity to fire that turn when the Star Chip is redrawn! Equally, another failure means that the cycle of being unable to fire your heavy weapon rolls on for turn after turn and you find yourself in a situation of never being able to fire that heavy weapon!

Actions - Single Actions v Double Actions: While there may be an expectation that Double Actions are better than Single Actions, there is no hard and fast rule as to which is best to use, it really is all situational. There's a few actions which can be directly compared to one another.

Move v Sprint: You want to be the person in the game who is shooting the most frequently so it's crucial to get into the right position as quickly as possible. If you know that you will not be able to get into position to fire at an enemy on a Single Action, use Sprint to maximise how far you can travel and make it harder for enemies to hit you. Also, if at all possible, move your model so that it finishes its Move or Sprint touching intervening terrain to provide a bonus to your Resist against enemy attacks. You still get a bonus to Resist if you aren't able to reach the terrain but put an obstacle between yourself and an enemy. Note that the problem with the latter is that both you and your opponent will both receive the Resist bonus. In general terms, only Sprint if you have to, you want to be attacking every activation if possible in this game.

Snap Shot v Aimed Shot: On the face of it, you'd think Aimed Shot should be your default option for firing. If you are going to be using an Aimed Shot, you really want to be putting the extra two Combat Dice into the damage end of the two rolls. Consider this though; two bonus damage dice isn't as good as landing two Snap Shots on target; two Snap Shots with a Power 3 weapon will give you a total of six Combat Dice as opposed to five if you use an Aimed Shot, while the same for a Power 4 weapon will deliver eight Combat Dice as opposed to six! Also, if I have poor Shoot, should I really add dice to the roll to hit rather than damage? Here's how I would decide:-

If you have a Modified Shoot of 1, putting both of the Aimed Shot bonus dice into rolling to hit increases your chances of hitting from 50% to 88.5%. 2 Snap Shots would have a 75% chance of at least one hitting the target but only a 25% chance of both hitting. Aimed Shot is best bet with bonus dice added to Roll to Hit, but putting one dice into rolling to hit and one on to damage is a great option also.

If you have a Modified Shoot of 2, you have a 75% of hitting the target. The odds of hitting are firmly in your favour so Aimed Shot bonus dice are better employed in the damage end of the equation. The chance of both of your Snap Shots landing is 56.25%. You are marginally better gambling on 2 Snap Shots at Shoot 2 but I think the surest option here is for an Aimed Shot with the bonus dice added to Damage, particularly if your weapon is Power 3. At Power 4 you have a bigger pay-off for your damage rolls so I'd be slightly more inclined to go for two Snap Shots!

If you have a Modified Shoot of 3, you have an 88.5% chance of hitting your target and a 78.3% chance of both shots hitting. In terms of rolling to hit, it should be Snap Shots all the way if your modified Shoot is 3 or more! The one caveat to this is would be if your target has a High Resist and is claiming Hard Cover; fewer Combat Dice for Damage may struggle to inflict any damage.

Fight v Charge: When I started playing, I initially thought that Charge was more desirable because of the +1 to Power. In actual fact, Charging is far less desirable in relation to Fight than Aimed Shot is to Snap Shot. You should only ever use Charge if you aren't close enough to the target to instigate a desired Close Combat, otherwise 2 Fights in one activation are always better than 1 Charge attack.

Other Actions: The remaining actions cannot be compared so I've dealt with them one by one.

Throw: This can be a dangerous action to undertake! I wouldn't mess around with this unless I had a modified Fight of at least 2 (75% chance of throwing the object where you want it). You do not want to fumble a Throw with a Time Bomb if you are close to the target - you could end up with it scattering right back at your feet!

Jump/Climb: Costing a double action to use, try to avoid this action if at all possible as it slows progress considerably.

Shake It Off!: Obviously only use this when necessary. 

Overwatch: This is useful action in certain situations but sacrificing 2 Snap Shots for 1 is not a winning strategy. Also, the fact that you can lose Overwatch fairly easily is worthy of consideration, especially if your opponent has some long range weaponry in their arsenal.

Hunker Down: Again, you'll only ever use this when in need. In practice, I find it's not really worth doing unless you have suffered 3 Injury Markers. Of course, if you are playing the Gronk, use this action where you can since you can heal all wounds for allies!

Combat: The most important aspect of Combat, the rolls and the damage you can inflict are covered in the actions above but there is more to consider.

Dodging Hits: Evade is great to have but it is far from reliable! The odds of you successfully evading are 16.67% if you have Evade of 1, 30.56% for Evade of 2, and even Johnny Alpha can only expect to Evade 42.13% of the time!

Resisting Hits: One of the reasons it's key to inflict as much damage as possible in the game is that there is a higher chance of your hits causing damage than there is of your Resist soaking up damage. As mentioned in the Move/Sprint action tactics, the bonus 2 Resist dice for claiming Hard Cover is a huge bonus and should be taken advantage of as often as possible. 

Multiple Guns/Close Combat Weapons: They only serve to increase your chances of hitting but conversely reward your enemy with +1 to Resist. Only use these if your modified roll to Shoot or Fight is 1. Remember also that just because your character may be equipped with two or more weapons, it doesn't mean they are obliged to fire more than one in an attack - it is always your choice to do so.

Back Shot: It doesn't come up too often but the -1 to Resist that your enemy suffers if shot from behind his front arc is handy! It's always satisfying when you can get your outlaws into the position to make use of this sneaky thematic rule!

Pinned: Being Pinned is a major pain! The odds are only slightly in your favour of passing the Cool test at the start of an activation if you have a Cool of 4. On top of that, it effectively disables Gunfight and Brawler Abilities. One thing I always forget about being Pinned is that if someone attacks you in Close Combat, they get a +1 on their roll to hit you. Basically you never want to be Pinned but if you are using characters of Cool 4, you will be Pinned on a frequent basis due to failures when Going For Broke!

Gunfighter: This is a good skill to have, and due to the fact that it will be triggered by a Special result either when making an Evade roll or on any Resist dice, there's a reasonable chance you may get to make use of it. The big question is whether Gunfighter is so good that it is worth avoiding Going For Broke and potentially Pinning yourself which prevents Gunfighter from activating. The answer probably lies in how much incoming fire you expect your model to endure; if it's maybe going to attract fire from more than two enemies, perhaps it is better not to Go For Broke. My personal feeling is that you are always better being the one taking the actions rather than relying on this activating. If you're lucky in returning your Star Chips to the bag, there will be times in the turn when you are not Pinned and Gunfighter can activate. I have to mention that it's always great fun when Bullet Time kicks in; I had Johnny and Stix exchanging about four volleys of blaster fire in the one attack in a recent game (somewhat appropriately Johnny prevailed)!

Brawler: While it's nice to have, the Brawler skill only comes into use when you are attacked by an enemy in Close Combat. The problem is that if you have Brawler skill, you are more than likely pretty powerful in Close Combat so it isn't exactly like enemies will be rushing in to fight your Close Combat specialist! The most likely use you will find from it therefore is after you engage enemies, if you do not incapacitate them immediately in the fight, when they inevitably fight back, the Brawler has a good chance of coming into use (your opponent's only alternative is to flee the combat which usually gives you a free attack). If you find your Brawler engaged in Close Combat, it may well be a good move not to Go For Broke, particularly if engaged by multiple enemies.

Mounted Models: Bear in mind that while mounted, your models are fast moving but easier to hit. In general terms I'd use them to get you where you need and then dismount. It's worth having a look at the strengths of your characters if you are thinking of using morks or skimmers in your game. Clue: Johnny Alpha is best employed on a skimmer, Wulf on a mork! 

Flame Weapons: It's very easy to forget that these weapons ignore modifiers for cover - note that this applies to Kansyr's blister effect Hand Blaster. In addition to that, Steelkreeg's firepak can also scatter and automatically stun enemies if it pins them - that's on top of any damage inflicted! Nasty!

Blast Weapons: Another thing I always forget is that targets of Blast Weapons gain +1 to their Evade, even if they have none. Note to self: this means Steelkreeg does not automatically die if a Time Trap is thrown at him, he does have a (small) chance of survival! 

Heavy Weapons: It's a serious dilemma when you're carrying a Heavy Weapon whether to Go For Broke or not - to the point that I almost feel like the best thing to do with Heavy Weapons is to give them to models without Star Chips! Be mindful that your Heavy Weapon may not necessarily be the best option. Take Max Bubba: you'd think you'd always want to use that Blazooka but his gun is more effective unless you are outwith blaster range or you have a nice group of targets to fire at. If the opposite is true, either an Aimed Shot or Two Snap Shots with his blaster are better options than the Blazooka itself. Also, think very hard about where you position any model you have that is only armed with a Heavy Weapon. You need it to be in place to fire immediately otherwise you will not be able to shoot when you activate. Once you've played Steelkreeg a few times, you'll know what I mean!

Armoury Cards & Chicanery Cards: These are so variable that it would require an entire post on each to deal with the myriad weapons and tricks. First to mention is that they're great fun and succeed in bringing a lot of the flavour of the strip to the table. Note that Cartridge Armoury Cards cannot be played by any named character other than Johnny Alpha. You'd need to create your own characters with a cartridge blaster to use them with anyone else.

The best advice I can offer is to take your time reading what the effects of all cards you are dealt are before the game starts and try to keep them in mind throughout. They are all useful in their own ways but T-weapons in particular are deadly. Medpacs and any Chicanery that revives characters or can return Star Chips to the bag are very powerful too. Pray your opponent doesn't have any of these! 

General Game Tactics: 

1. Be clear how you want to operate each of your characters in your band ahead of play. For example, you will want to use Johnny Alpha for ranged combat, while Wulf should be engaging enemies in Close Combat. There is a tactics guide for every named character in the rulebook on this blog, these can better guide you how best employ your characters.

2. Keep your models a good few inches apart. Bunched groupings attract fatal T-Weapon or Heavy Weapon attacks.

3. Get into position as quickly as possible and attack as often as you possibly can.

4. Target enemies at the closest range (easiest to hit) and pick off the weaker ones (lowest Resist) first. The faster you reduce the number of guns firing upon you, the quicker you will achieve victory!

5. Make use of additional Armoury and Chicanery Cards but do not become obsessed with doing so!

6. Don't forget the Scenario goals - it's easy to get drawn into a straight up fight which may be fun but a savvy opponent could exploit this by, for example, stashing Cache markers in a Hold-Up.

7. Have fun!


Coming Soon: Tactics for S/D Agent bands and example S/D Agent bands.
Two bands prepare for battle in a Showdown! scenario I recently played!


Strontium Dog Miniatures Game - Conspiracy! Part 5

Conspiracy! Solo Play Campaign Part 5

Introduction

My Solo Play Campaign continues with another playtest of the Solo Play Rules which I recently posted here. As usual, standard text provides battle report information, while text in italics continues the narrative story.

Scenario Background

Johnny Alpha by Carlos Ezquerra
Copyright Rebellion 2000AD Ltd
The wreckage of their shuttle burning brightly behind them, Johnny and his band find their path blocked by a law officer.

"Looks like you've had a bit of trouble," he says. "You wouldn't be thinking of causing more, would you?"

"Ye might want tae think twice about bammin' us up James," Middenface snaps. "We're no' in the mood fir any backchat."

"We're licenced Search/Destroy Agents," Johnny interrupts, displaying his badge for inspection to the officer. There's three bodies here for collection."

"Do I look like an undertaker to you, mutie," the officer snaps.

"You look like you need to step aside," Johnny says firmly, "and let us get about our law enforcement work."

"Law enforcement," the officer exclaims. "If only my team knew something about that! They're all in Bubba's pocket! I can't get anyone to stand up to them. That's why I'm here. If you were happenin' to to be heading over to deal with that mutie filth, I'd help you...er, men...and women, beggin' your pardon ma'am."

"That explains why no one in this town's challenged Bubba," Red says to Johnny. "They're all corrupt!"

"Or scared to death," the lawman adds.

"Ve don't need help from vorthless voorms like this," Wulf says disapprovingly.

"You got a map of the town?" Johnny asks. "It would be handy to plan our attack."

"Sure have," the officer answers, plucking a device from his pocket. He switches it on and pulls up a map on the screen, highlighting the area where Bubba's bunker is situated.

"Good," Johnny nods. "Then you're in...what's your name?"

"Buell."

"Well Buell, we're going to need to cut off Bubba's escape routes so we can shut him and his so-called 'organisation' down once and for all. That means we're going to spread out around the town..."

Later...

The sun has long since set and the streets are empty...but not in the middle of town. Two Howlers man guard towers above Bubba's bunker and his gang congregate outside. Another Howler, mounted on a mork, patrols the streets. All freeze when they hear Johnny's voice suddenly echo through the streets, issuing a challenge.

"Max Bubba! This is S/D Agent John Alpha! We're here to shut down your little 'organisation'! Surrender now and no one needs to die! Come out with your hands out!"

Max reveals himself at the bunker's mouth, staring into the darkness for a glimpse of Alpha, but he cannot discern anything in the gloom.

"We're just cogs in the machine, Alpha," Bubba replies. "If you think we're in charge of the organisation, you've got it wrong."

"Ach, lyin' wee numpty," Middenface mutters.

"Then you've got no reason not to surrender," Johnny insists.

"The warrants on our heads are reason enough, Alpha! Besides, our employers wouldn't take kindly to just handing ourselves over. Could be a terminal mistake!"

"Then you made your choice! We're taking you all down!" 

"You heard him boys! Typical stinkin' Stront, hunting fellow muties for blood money! A traitor to his kind! Hit 'em!"
Max Bubba by Carlos Ezquerra
Copyright Rebellion 2000AD Ltd

As his goons take up defensive positions, Max returns to the bunker where Kansyr and Billy Joe are exchanging anxious looks.

"What's the plan?" Billy Joe asks urgently.

"We hang tight. Let the boys deal with Alpha. If we see a chance to make a break for it, we take it. Kansyr, see if you can get in their heads - it wouldn't do our cause any harm to have 'em plugging each other!"

"I'll keep these at the ready," Billy Joe says, activating his las-whips. "Just in case. I'd love to whip that Alpha to within an inch of his life! I figure a traitor like that, preyin' on his own kind? Man's got it comin'!"

Forces

Player Band
Johnny Alpha (hero mode)           19 Notoriety (Leader)
Wulf Sternhammer                       15 Notoriety
Middenface McNulty                   13 Notoriety
Durham Red                                 13 Notoriety
Blubberlips                                     5 Notoriety
Total: 65 Notoriety

Enemy Band
Max Bubba                               18 Notoriety
Impetigo Jones                           6 Notoriety
Brute Mosley                              6 Notoriety
Low-Down O'Phee                     5 Notoriety
Skull                                           5 Notoriety
Kansyr                                      10 Notoriety
Billy Joe                                   16 Notoriety
2 x Howler                                12 Notoriety
Total: 78 Notoriety

Game Notes

Job: Headhunt
Encounter: Bushwhack
Collateral: 100,000 for Player Band (100K spent on local guide), 100,000 for Enemy Band, spent on 2 extra Chicanery Cards.

Special Rules:
1. Each side of the board will be assigned one or more models from the Player Band. While these models remain in play, none of Bubba's gang can escape on those "protected" edges of the board.
2. When activated, models can change which board edge they are covering. When a change is declared, it must be the closest board edge which they will be covering. The previous board edge will open up as an escape route unless another model is still assigned to covering it.
3. Max Bubba, Kansyr and Billy Joe will attempt to exit the board once an escape route is opened up. Max regards his men as fodder so instructs them to take down Johnny and the gang no matter what, to fight to the death!

The Encounter

Set Up: Confirmation of the band. Note that the Dredd figure represents Buell, the guide & law enforcement agent.


The Armoury and Chicanery Cards aren't the greatest I've ever had, but Playing Dead is always a good card to have!


Bubba's gang.


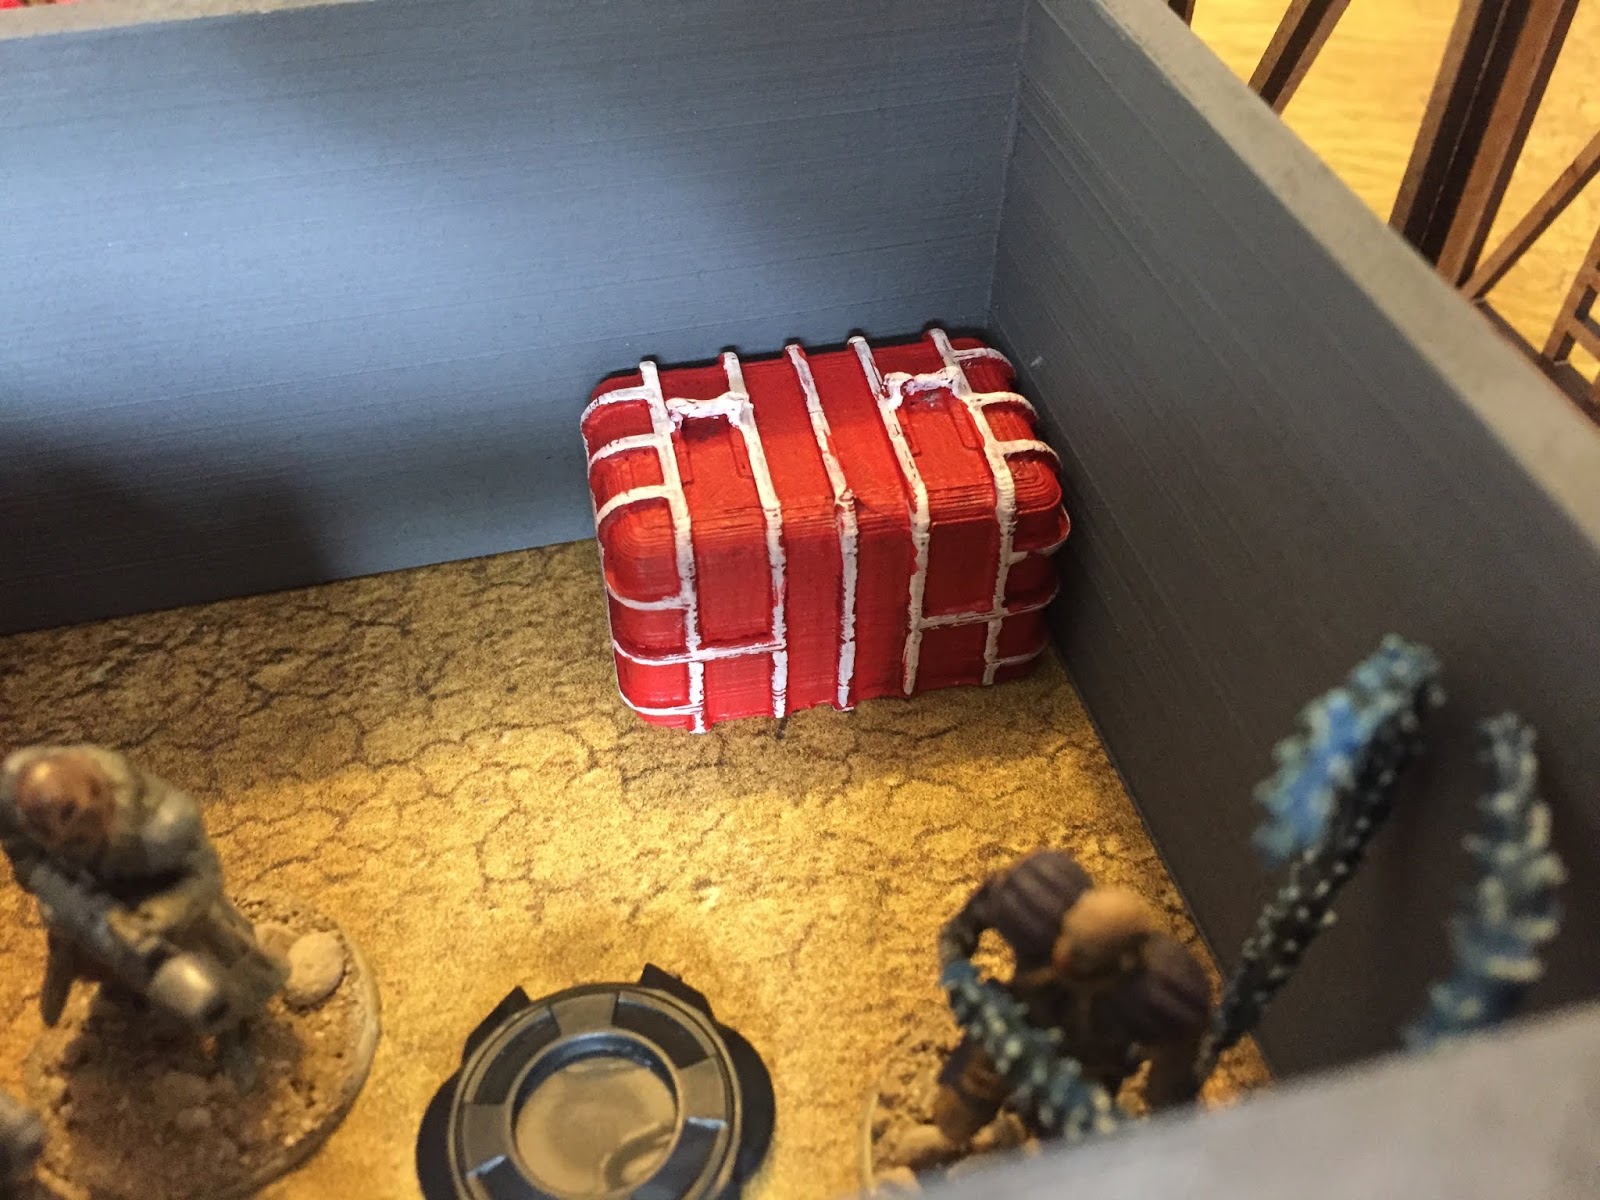
An overview of the battlefield. Bubba's bunker is in the centre of the board.


Johnny and Blubberlips will attempt to hold this side of the board.

"Blubberlips! We can't allow anyone to get past us," Johnny waves to his fellow agent.

"We won't," his friend replies stoically..


Wulf and Buell are tasked with holding this side of the board.

"I hope your mutie friends are as good as you say they are," Buell says. "I've no plans on dyin' yet. Beats me why an honest law abiding norm like yourself is hanging around the likes of them."

"Best you don't speak voorm," Wulf replies, pulling an old sock from one of his pockets. "Der Sternhammer silencer vill deal vith you if need be." 

"Eh?"

"Put der sock in it," Wulf scowls. "Or I vill. Ve vill stop anyone escaping this way."


Middenface is covering the rear.

"Ah've got the bunker bahookie covered," Middenface whispers over his comms.


And Durham Red has this flank to cover.

"And I've got the other flank covered," Durham Red adds. "You gotta a Howler patrolling on morkback coming your way, Middenface."


Meanwhile Bubba is firmly ensconced within his base!

"Aye, an ah kin see a pair o' Howlers oan those towers!"


Turn 1

Skull is put on overwatch.

"Can't see a thing," Skull mutters, aiming his stormer into the darkness. "Show yourself, Alpha!"


Johnny Alpha activates.

"Happy to oblige," Johnny shouts, raising his Westinghouse blaster...


He Moves then Snap Fires through the gap in cover at Brute!

BLAAM!


But somehow Johnny misses! To make matters worse, he is Pinned when he has a Go For Broke Fail (henceforth known as GFBF for my ease but no one else's). You know that when there's a GFBF, the character is Pinned so I will no longer keep repeating that either...

"Damn, missed," Johnny thinks.


It takes Brute a moment to realise someone shot at him! He then spots Johnny and takes an Aimed Shot!

Brute stares at the dirt where Johnny's bullet kicked up dirt beside him. He looks back up and spots Johnny in the distance. Taking his time, he steadies his aim and fires!


The cover helps protect Johnny, minimising the damage to a stun!

"Ugh!"


Impetigo Jones activates next...

"You bit off more'n you can chew this time, Alpha," Impetigo Jones says, raising his stormer.


He also fires an Aimed Shot at Johnny!

BAKUUM!


And wounds Johnny!

"Argh," Johnny cries. "They're better shots than I gave 'em credit for! Gotta tread carefully!"


Blubberlips is next...

"Hold on Johnny," Blubberlips reassures. "I got you covered!"


And takes a Snap Shot but misses!

Zaddow!


And Blubberlips suffers a GFBF!

"Sneck," Blubberlips curses. "Missed him!"


Kansyr activates and opens his mind to probe an enemy...

"Can you sense 'em," Bubba asks. 

"Yes," Kansyr replies. "There's five Stronts...and a local...lawman."

"Can you take control of their minds?" Billy Joe questions.

"If the pair of you'll shut up, maybe..."


He senses the wounded Alpha and takes full advantage, overwhelming his mind while he is distracted with pain! Johnny fires a Snap Shot at Blubberlips...

Kansyr reaches out with his mind, unseen tendrils probing the dark. 

"Alpha," he says, eyes widening with excitement. "You're pointing your gun at the wrong guy. Point it the other way..."

With disbelieving eyes, Johnny feels compelled to aim his gun at Blubberlips! He squeezes the trigger...

BOOM!


Inflicting two injury markers!

"Argh," Blubberlips cries in surprise. "You shot me! What the sneck?"


Mercifully, Kansyr has a GFBF!

The trio of Kansyr, Max Bubba ad Billy Joe cackle at Blubberlip's distress!


Max Bubba is next to activate.

"Time to put that fat-lipped mutt down," Max sneers.


He moves and then takes a Snap Shot at Blubberlips!

"Keep out outta the way Brute," Bubba shouts from the safety of the bunker. "I'm tryin' to bullseye that sucker!"


He inflicts a stun - but it is enough to incapacitate Blubberlips!

Bubba's shot merely clips Blubberlips but knocks him off-balance! He spins, falls and cracks his head off the metal cogs of the generator, knocking him unconscious!


And he returns his Star Chip to the bag.

"Got him," Bubba congratulates himself.


Buell sprints forward to close in on the enemy.

"Let's hit those creeps," Buell says, rushing forward.


Stupidly, he suffers a GFBF (with Cool of 2, I shouldn't have gambled)!

"I've got a visual on a Bad Boy patrolling on morkback," he says.


Realising Billy Joe won't be needing his Star Chip this turn, I give it to a Howler on one of the guard towers. He spots Buell and raises his Stormer!

"Tss," a Howler grins, training his stormer upon Buell. "Lawman warned. Keep out of our business. Now die."


Buell is fortunate to only suffer a stun!

"Drokk, perps in the towers have long range weapons!"


GFBF!

"Tss, lucky lawman!"


Durham Red takes a move action...

"You want a job done properly," Red sighs, "you gotta get a woman to do it." 

Silently she moves through the desert streets, closing in on the bunker.


It's doesn't look like it from this camera angle but Red is out of sight from Skull (who is on Overwatch). She can see Brute though!

"Got a visual on Brute," she says, raising her pistol.


And back-shoots him with a Snap Shot, inflicting two wounds!

"Arghh," Brute cries. "Some sneaky snecker back-shot me!"


Red's Star Chip is returned to the bag and comes straight back out! She takes another Snap Shot at Brute!

"That's right Brute, this sneaky snecker back-shot you! Have another!"


And incapacitates him!

"Durham Reddddd..." Brute wheezes as he crashes into the sand, incapacitated by Red's second volley.


She takes a risk, deciding to switch cover to get into position to fire at Skull.

"Gotta chance breaking cover to get into a better position," she thinks.


This exposes her to overwatch fire...

As she does so, Skull spots her and unleashes his Stormer.

"You're no Dog," Skull roars, "but I'll put you down...bitch!"


But he misses! Once again, her Star Chip goes back in the bag.

Skull's shots kick up the sand all around Red as she leaps to safety!

"Gotta shoot straight, Skull," Red taunts. "Here, let me show you!"


And she reactivates, taking an Aimed Shot at Skull...

She rolls to her feet and takes aim at Skull...


Inflicting two wounds! Her Star Chip goes back in the bag again!

"Ugh," Skull cries as a bullet punctures his armour, shattering his shoulder!


Low-Down O'Phee spins around...

"I'll deal with her," Low-Down hisses.


 ...and, spotting Red from afar, returns an Aimed Shot with his Stormer (24" range as per errata).

"Chew on this Red," Low-Down shouts.


Hitting her and inflicting two wounds!

"Argh," Red cries. "Typical short man syndrome - overcompensating with that hand!"


She activates again and decides to take cover and Hunker Down.

Red crouches against a wall and, repurposing a belt as a tourniquet, tries to stem the blood.


She fails to heal a wound (she would have been only able to heal one wound as you always carry at least one injury marker after you've suffered a hit)! I decide not to attempt to return the Star Chip as her wounds have dramatically decreased the odds of success and I want to be certain of being able to have a double action available to Hunker Down again next turn.

She succeeds in stemming the flow of blood but she is badly wounded!


Middenface joins the fray!

"Haud oan Buell, ya daftie" Middenface exclaims. "You're going tae get yersel' killed!"


He Sprints to close in on the Howlers in the watchtowers and the Bad Boy who is circling the compound. GFBF!

Middenface sprints forward and closes in on the patrolling mounted Howler. 


Wulf Sprints also.

"You're both going to get yourselves killed old cucumbers," Wulf says. "but faithful Wulf vill follow where you go!"


...getting close to the Bad Boy but also suffers a GFBF, leaving him exposed!

"Ve be der three little ducks now, eh Middenface?" Wulf grins.

"Er, aye, whitever you say big yin."


A Howler tries to take advantage of the situation...

"Die," A Howler snarls as he has Middenface in his sights...


...but its Aimed Shot goes astray.

...but misses!


The Bad Boy Charges Wulf and stuns him! End of Turn 1.

The Howler on the mork hisses and charges Wulf, the beast head-butting his arm. Wulf grimaces as his arm is deadened - but thankfully no bones are broken! 


Turn 2

Before any chips can be drawn, I play Adrenaline Surge to clear Johnny's Stun and Pinned markers. The wound remains in place. He attempts a snap shot at Impetigo Jones...

Johnny Alpha targets Impetigo Jones...


And inflicts a wound!

...and clips the outlaw!


Impetigo Moves fires a Snap Shot but the cover saves Johnny! Impetigo then moves behind some crates.

Spitting curses, Impetigo Jones returns fire before taking cover. 


Johnny fires a No. 4 Cartridge!

Johnny ignores Impetigo's stormer shots as they riddle the machinery around him, loading a special cartridge into his blaster.

"No.4 Cartridge," he says, squeezing the trigger. 


Bullseye! The Cartridge explodes in between Low-Down and Skull!

The shot fizzes through the air before striking the bunker, exploding spectacularly! Skull and Low-Down wail as they are engulfed in flame!


Skull is incapacitated and Low-Down wounded twice!

Skull falls to the ground and lies still. Although badly wounded, Low-Down pulls himself up to rest upon a crate.


GFBF for Johnny!

Johnny takes no satisfaction from killing Skull, but neither does he feel regret. Skull would happily kill him and his friends. 


Kansyr attempts to take control of Johnny, but the S/D Agent's guard is up after his earlier failure. Kansyr then suffers a GFBF!

Kansyr tries to take control of Johnny's mind once again but this time Johnny's mental defences are up, defences which Kansyr cannot penetrate!


Wulf has a Pinned marker which requires a Shake it Off! action to clear. He opts to use the other action to Fight rather than use Shake it Off! to clear the stun.

"Wulf vill make you pay," the Viking grimaces, swinging der Happy Stick.


The Bad Boy is wounded but is the first in this game to pass a Cool test and play a Chicanery Card to negate the wounds (all previous wounded models failed their Cool tests until now)! GFBF for Wulf!

...but Wulf's swing is wayward and the mork easily evades the attack!


Middenface Charges the Bad Boy!

"Haud oan big yin," Middenface yells. "Ah'll help ye take that hairy Howler doon!"


Chicanery comes to the rescue again and Middenface has a GFBF!

Middenface attempts to deliver a Glesgae Kiss to the mork but misses by the merest of fractions!

"No' again," Middenface bemoans. "It's no' as if mork's backsides urnae big enough tae hit!"


A Howler fires at Middenface but misses!

The Howler targets Middenface but misses by some margin!


Buell has to use Shake it Off for his Pinned marker and Moves.

Buell somewhat cautiously pushes forward...


But suffers a GFBF.

"Creeps are tough," Buell observes.


Middenface is targeted by the Howler on the other guard tower. Due to having a Pinned marker to clear, the Howler can only fire a Snap Shot!

"Gi'e's a break," Middenface shouts as he spots another Howler targeting him!


Which is just as well for Middenface as the additional power would have likely done more than just stun him!

The shot cracks off of his armour, but still puts Middenface off-balance!


Low-Down opts to Hunker Down.

Shaken and wounded by the No.4 Cartridge, Low-Down beats a hasty retreat to safety behind the bunker walls.


But he fails to heal any wounds!

"I need a med-pack," he moans.

"You need a backbone," Bubba rages. "Billy Joe, Alpha's on the rack! Finish him with those las-whips of yours."


Max orders Billy-Joe to finish Johnny! Billy-Joe Sprints and rolling a 6...

"Happy to oblige," Billy Joe replies and sprints out of the bunker...


...covers a lot of ground (and passes Cool tests for negating cover while Sprinting)! He returns the Star Chip to the bag...

...and closes in on Johnny!


Reactivating immediately, he Moves again...

Billy Joe realises that the cover Alpha has will entangle his las-whips so he moves again...


And then Fights - inflicting another wound on Johnny!

"I'm gonna flay the skin from your body, boy," Billy cackles, his las-whip lashing out!


GFBF for Billy-Joe.

"Don't hog all the fun," Billy orders, distracting his brother.


Bubba goes on to Overwatch.

"...once Billy Joe finishes Alpha, we can make a run for it," Bubba says, aiming his blaster into pitch blackness.


Red Hunkers Down.

Red bandages up her leg wound.


This time she can remove one wounded marker. I decide not to Go For Broke!

She feels more comfortable but won't feel back to full strength until she has seen the Gronk again!


The Bad Boy activates and Charges Wulf!

The Bad Boy bares his teeth and lunges at Wulf as he attacks again from his mork. 


...wounding him!

He tears a chunk of flesh from Wulf's shoulder! 

"By der Gotts," Wulf cries.


An overview of the battlefield at the end of Turn 2.


...and an overview from the opposite end of the battlefield. End of Turn 2.


Turn 3

Billy Joe is the first to activate! He charges Johnny!

"Eat lash doggie," Joe laughs, wounding Johnny a second time!"


Wounding him again! Billy Joe returns his Star Chip to the bag!

"I told you not to hog all the action," Billy sulks.


Impetigo Jones cannot see Johnny for the cover so he opts to go on Overwatch.

"If Alpha sticks his head out, I'll pop it off," Impetigo thinks.


The Bad Boy activates and charges Wulf again!

The Bad Boy strikes at Wulf again!


And inflicts another wound!

The alien's vicious claws tear at Wulf's face, wounding him further.

"Big yin," Middenface says helplessly as he stares on in horror at Wulf's injuries. 


The Howler on the tower has a clear bead on Wulf!

"Tss, now I have you," a Howler above hisses, it's gun trained directly on Wulf!


And takes him down!

Crrrackkk! The shot puts Wulf down!


The other Howler fires at Middenface!

"Naaaaaaawwwwww," Middenface cries.


Stunning him again! It could easily have been worse though!

A second shot hammers Middenface's shoulder armour, stunning him!


Billy Joe spins around as he lashes Johnny again!

Billy spins to the front and, eyes filled with hate, lashes Johnny!


And Johnny Alpha is felled! Not only that, but this opens up this edge of the board for Max Bubba and his goons to exit!

Johnny howls in pain before falling backwards and losing consciousness. Billy's eyes widen in delight!


Billy Joe sends the Star Chip back to the bag.

"Alpha's down," Billy shouts. "The coast is clear, Max!"


Middenface is limited to using Shake It Off! twice, removing a Pinned marker and one Stunned Marker.

"Scunners," Middenface weeps. "Ah'll kill ye all!"


I forget that he can ignore the first Stun/Injury Marker and instead play it safe by not attempting to return the Star Chip to the bag.

"Kill us?" the Bad Boy mocks. "You can barely stand!"


Max Bubba activates and Sprints.

Now that he has a route out of the battle, Max sprints from cover...


He is tantalisingly close to exiting the board. His Star Chip goes back into the bag.

...safety is so close now!


Low-Down Hunkers down again, but once again has no success in healing his wounds!

"Help a mutie out here, will ya?" Low-Down pleads to Kansyr as he fumbles with a med-pack.


Max is able to activate and Move off the board, escaping the Strontium Dogs!

"Keep fighting lads," Max orders his men as he runs off into darkness. "You've got 'em on the rocks! Finish 'em for me!"


Red activates and Moves...

"Got to stop more scum escaping," Red grimaces, pulling herself back on to her feet.


...and has Billy Joe in her sights. She fires a Snap Shot!

She strides out of cover, guns blazing!


Wounding Billy Joe twice! Red returns her Star Chip to the bag.

"Argh," Joe wails involuntarily as two bullets find their mark. "Durham Red! She'll blow us to pieces before we can get close enough to lash her!"


But as she reloads her guns, Billy-Joe runs to safety (off-board)!

"Let's git while we still can," Billy agrees and they too run off into the night!


Buell activates, but has to use Shake it Off! for his Pinned marker before moving forward...

"Hold on mutie," Buell says to Middenface. "I'm coming!"


...Positioning himself to fire upon the Bad Boy or the Howlers in the guard towers above.

"Anytime a'fore dawn wid be helpful," Middenface responds.


Red Moves forward looking for other prey.

Red is furious that Billy Joes has escaped and limps forward, searching for more enemies.


She fires a Snap Shot at Impetigo Jones.

She spots Impetigo and opens fire!


Inflicting a wound!

She finds her mark and wounds him!


GFBF!

Red ejects another clip as she takes cover behind a beaten-up generator.


Playing Dead Chicanery Card resurrects Johnny! I could have used this sooner to stop both Max Bubba and Billy Joe escaping but it would have opened a situation that wasn't covered in my scenario rules. I decided that once Johnny was defeated, the escape route was opened for Bubba & co and that it would have been too gamey for it to have been closed down again because of a Chicanery card.

Johnny passes a Cool test to remove the Pinned Marker, and makes a Shake It Off! single action to clear the stun...

Johnny Alpha suddenly climbs back on to his feet...he had been playing dead!


And then, in a somewhat uncharacteristic move for me, he uses his Johnny Weird-Eyes and his variable blaster to finish Impetigo Jones but his shot fails to harm him! GFBF!

His Alpha-rays penetrate the cover and, using his Westinghouse variable blaster, he fires at Impetigo Jones through cover! He miscalculates the variable shot however, and it embeds itself in a crate beside Impetigo!


Kansyr seizes his chance and Moves twice (Low-Down was in his way and therefore blocked a Sprint). He returns the Star Chip to the bag...

"It's every mutie for theselves," Kansyr grunts as he pushes past the badly wounded Low-Down.


And when he reactivates, he is able to Sprint and exit the board.

And he too sprints off into the night!


The gang's three most-wanted have escaped and will now join the forces in the next scenario!

Johnny sighs as he realises that the three most dangerous members of the enemy band have escaped!


An overview of the battlefield at the end of turn 3.


A second view...


And a final view of the state of play behind the bunker. End of Turn 3.


Turn 4

Middenface charges the Bad Boy.

"So ah can barely stand, eh?" Middenface angrily addresses the Bad Boy. "We'll see about that! Here's yer lumps!"


And takes him down with one Glesgae Kiss!

Middenface grabs the howler by the fur and headbutts the alien, his lumps caving its face in, instantly incapacitating it!

"How d'ye like that?"


He is targeted by a Howler!

The first Howler on the guard post takes an aimed shot at Middenface...


But only inflcicts a stun!

...but once again Middenface is only stunned!


The other Howler also takes aim at Middenface...

"Tss...now you die!"


And inflicts a wound...but Middenface is still standing!

"Argh," Middenface yells as he suffers another wound. "Is that the best ye can dae? It takes mair than that tae put a McNulty doon!"


Durham Red spots Low-Down O'Phee skulking in the archway to the bunker and fires an Aimed Shot.

"I owe you this," Red hisses as she trains her guns on Low-Down.


Taking Low-Down down! Her Star Chip goes back in the bag!

Scratch Low-Down O'Phee!


Impetigo Jones Hunkers Down and removes one of the two Injury Markers he has.

"How the hell did Alpha fool us," Impetigo whimpers, pulling bandages from his face to tend to his wounds.


Red trains her guns on him and takes a Snap Shot!

Red squeezes off another shot at Impetigo!


A Chicanery Card saves Impetigo from harm...

...but only shoots up a crate next to him...


Red fires a second Snap Shot.

...so fires again...


But another Chicanery Card nullifies this attack as well!

...but again, she only shoots up his cover!


GFBF!

"This one's got more lives than a cat, Johnny," she shouts.


Johnny activates and Shakes Off the Pinned marker. He Moves forward...

"Sooner or later he's going to run out of luck," Johnny answers as he gathers his composure.


...returns the Star Chip to the bag...

He strides out into the open, face to face with the wounded Impetigo.


...then reactivates and fires two Snap Shots.

Johnny fires twice at Impetigo...


...And puts him down! His Star Chip goes back in...

....finally defeating the mutant!


He moves up, shooting a Howler in the back but does no damage. The Star Chip is returned once more - and then again!

Johnny isn't finished though. He strides forward, guns blazing...


Peppering the platform with shot after shot, the Howler has two Chicanery Cards save him until finally he is felled! Johnny suffers a GFBF, but what a run of activations!

...shot after shot peppering the closest guard tower and Howler with blaster fire! Wailing, the Howler falls form the tower!


Buell is last to activate.

"Can't let these muties get all the glory," Buell thinks, raising his blaster to target the last Howler...


He takes an Aimed Shot...

...and shoots...


...and shoots the alien from it's perch, incapacitating it!

...and hits it clean between the eyes, killing it instantly!


A final look at the field of play at the end of the scenario.


Aftermath

"Bubba, Kansyr and Billy Joe escaped," Johnny says. "I'm going after them. They'll die for what they did to Wulf."

"Haud oan Johnny," Middenface waves. "Wulf is still alive, we need tae get him tae the Gronk."

"Blubberlips is still alive too - barely," Red adds, joining the group.

"You muties helped our town, allow me to return the favour," Buell says. "We can go to my place to get you attended to, it isn't far."

Johnny hesitates momentarily as he is still enraged by the price that his friends have been paying for taking on the 'organisation'. More than anything, he wants to finish the job...but seeing Wulf in a bad way, his wounds bleeding into the sands, somewhat tempers his mood and he concedes that they need to regroup.

Carrying Wulf between them, they head to Buell's house where they are met by the Gronk and Kid Knee.

"I couldn't leave," Kid says. "You got my help until this thing is over."

"You're a real hero, Kid," Red says.

The band pour inside Buell's small and spartan abode and set Wulf and Blubberlips out on a table. The Gronk tends to Wulf through tears.

"P-poor Mr Wulfses," it weeps.

"If anyone can get him back on his feet, it's you little fella," Johnny says grimly. "Give it your all."

"Whit's the next move Johnny?"

"Bubba's a coward. He'll already be on a shuttle off Alzir. I've messed up our chance to shut his little 'organisation' down...it's over."

NEXT PROG: Showdown in the sand!

Closing Reflections 

What a battle! The first turn went particularly badly for my S/D Agents with Blubberlips being taken out of the action and a number of failures to return Star Chips didn't help! Things improved in Turn 2 but when Johnny and Wulf were both incapacitated in Turn 3, things looked really grim! The Playing Dead! Chicanery Card may well have proven vital when it resurrected Johnny, without it, it was quite possible that Bubba's remaining goons may have been able to finish off the party. The fact that the three most-wanted members of the enemy band escaped will make the next and final scenario more difficult as they will bolster the band facing Johnny and his friends!


Strontium Dog Miniatures Game - Mutant Army Generals

Mutant Army Generals Strontium Dog Mutant Generals Image (c) Warlord Games Along with the Kreelers, one of the last sets that was released f...