Star Wars D6: Green Vipers Episode VII

Episode VII - The Plant

Introduction:

The Long Shot campaign continues with this adventure outlined in the Classic Adventures book. All of my additions to the outline feature under Closing Reflections at the end of this report. As usual, I own none of the images which were mostly sourced from google images. Please note that this is an advert free, not for profit blog. 
Additionally, please visit The Rancor Pit. The support shown to me by fellow GMs and players there has been wonderful - thanks again to all of you who are reading these write ups! 

JiBa Unchained:

Music Cue: Rebel Briefing
Once again, General Reekeene calls the Green Vipers for a mission briefing. As the team settle in, she activates a holographic display, showing the planet Iyuta. 

Iyuta

General Reekeene: Maars, you may recall on your first outing with the Vipers that you captured Moff Dixton. Now, this dustball may not look like much, but one of the secrets Dixton spilled was that there's an Imperial Communications Centre on this planet. During Operation Retribution, the Blue Lightning squad uncovered more information about the Centre, namely that it is built atop an an ancient sewer system. I think it's possible if a powerful listening device is planted in the sewers we will be able to listen in to all Imperial transmissions in the Fakir Sector. Naturally, such a planet is heavily guarded by Star Destroyers and spy satellites, so you'll have to go in undercover. Head for the Rusty Bucket, a bar on the Strip in the city of Takari. Our agent, Chilla works there. She'll provide you with more information and transport to the sewers. It's up you to formulate your reason for going to Iyuta, but report to Captain Hark'r for some important supplies, including the bugging device. Any questions? Good, dismissed.

The Vipers make their way to the store to meet Hark'r but his station is empty. A range of equipment has been laid out on the desk and there is a holographic projector alongside the equipment. Once activated, an image of Hark'r fills the air.

Captain Hark'r

Hark'r: Sss-chk-chk, ah Green Vipers! Regrettably I have travel arrangements so can't join you today! But, not to worry, old Hark'r has left all of your requisition items for your mission-chk-chk-chk! Fresh blasters, ammunition, comlinks, glow rods, the bugging device and five thousand credits for expenses...sometimes Imperial Customs Officers need a good bribe to turn a blind eye! So long Vipers! See you in hell-sss-chk-chk-kak-kak-kak!

Music Cue: General Grevious
The team grab their items and rush to the hangar bay. Looking around, they spot activity on the opposite side of the hangar. The cargo lift for the Martinette has half opened and JiBa stands behind a large cargo crate! Features contorted with hate and rage, he shakes his remaining fist defiantly in the air.

JiBa: Hear me Rebels! You haven't seen the last of JiBa! I'll kill you all!

JiBa

He kicks the crate off the elevator before closing the cargo lift and disappearing inside. The ship's engines fire up, and as it takes off, Captain Hark'r waves gleefully to the Vipers from the cockpit. It blasts off and, as soon as it clears the hangar bay, makes the jump to lightspeed. 

Music Cue: The Journey Home
As the Vipers open the crate, they find the bodies of three Duros - members of Purple Squadron that JiBa had just joined - inside. They appear to have been run through with swords. A note has been left upon them in JiBa's handwriting. It reads: A GOOD START.

Purple Squadron Duros

Tala: When I was part of Blue Lightning, I'd heard this JiBa was a maniac. This proves it...

A former crew mate of JiBa's, Corr Alden is shocked by this disturbing turn of events.

Corr: Ah flew wi' JiBa fur years... Ah cannae believe he'd dae somefin like this...

Corr Alden

C4-S0: Well I can! I told you the man was an imbecile! Good riddance to him! If only you humans listened to me in the first place, those poor Duros from Purple Squadron would still be alive! 

C4-S0

After alerting General Reekeene to JiBa's escape with Captain Hark'r, Captain Hannah turns his attention to the equipment Hark'r left them. Fearing JiBa has tampered with it in some way, Hannah orders a scanning crew to check it - particularly the bugging device for their mission - as well as their ship, the Yindao. Hannah is particularly concerned that JiBa will target his former friends, but they are unable to find any homing devices , explosives or signs of interference with any of the Yindao's hyperdrive, computers or hardware. While General Reekeene fears what JiBa may tell others, and reviews safety protocols on Nowhere, she orders the team to get on with their mission.

Undercover Escapades

Music Cue: Inner City
The bounty hunter Bots Vridak suggests they make use of his profession as a cover story. 

Bots: Captain Hannah is wanted by Empire. Could use as excuse to land on planet.

Bots Vridak

Captain Hannah: There's a bounty on my head?

Bots: 10,000 credits. For termination. You're deserter.

Tala: You weren't tempted to collect on it yourself?

Bots shrugs non-committedly. 

Corr: We'd be mad tae mention the Captain tae the Empire when he's oan oor team. Just pick somewan - anywan - else!

Bots checks his warrant meter for wanted criminals and picks the first name that comes up - a killer known as Myles Long who has a predilection for skinning his victims, leaving a trail of death across the Outer Rim. 

Bots: We say we're hunting Long. Empire will grant passage.

Hannah likes the plan and the Vipers set off in the Yindao for Iyuta. 


As they are hailed by one of the three Star Destroyers in orbit around Iyuta, Corr hands over his headset to Bots to explain the situation. After the Imperials initially believe Myles Long to be a joke name, the information Bots provided them with checks out and they are permitted to land in Takari. Hannah orders Bots to deal with the Customs Officer who seems hellbent on searching every nook and cranny for contraband. When Bots hands over the credit stick with 5,000 credits, the officer's eyes light up and he immediately instructs his men they have another ship to check...

While they make their way down the Strip, Kaleban is challenged to an arm-wrestling competition by some rowdy off-duty Imperial marines. Captain Hannah steps in to accept the challenge, but his arm is almost broken when the trooper wrestles with him! Surrounded by laughter, Hannah sheepishly slinks away, but his challenger suddenly shouts him back.

Marine: Hey, don't I know you? Have we met before? I could swear I recognise your voice.

Kaleban: Yeah, remember that advert for Fish Sticks? He sung the song, he loves Fish Sticks!

Kaleban Maars

Marine: Uh, yeah! We do too! Mon Calamari sure taste good when you smoke 'em!

Kaleban: I bet you like the taste of Quarren Fish Sticks, too!

Marine: Mmm! Yeah, I love them!

Music Cue: Cantina Band
As Hannah escapes being identified by his former crew of the Star Destroyer Patriarch, he thanks Kaleban for his ingenuity and quick thinking. Unfortunately, they soon discover that the Rusty Bucket has been burned down! They think better of approaching any more revellers, but do approach bar staff in the adjacent bar who tell them they can find the bar's owner, Chilla, in the Giant Step. Despite him having necked several drinks, Hannah orders Corr to approach Chilla. Mistaking his approach as advances to romance her, Corr completely alienates Chilla and is mocked by his friends! He bites his tongue however - he knows Santhou has advised against expressing anger. Captain Hannah intervenes to rectify the situation. Once he does, Chilla provides them with a rudimentary map and directs them to a repulsorlift around the back which will take them to the sewers. 

Chilla

C4-S0 refuses to enter the sewers and is told to hide in nearby bushes. Kaleban provides C4 a scarf to hide his glowing eyes, before they leave their droid to keep watch for anyone following them.

The Heat Is On

Music Cue: The Walls Converge
The team enter the sewers and, fearing the worst, cautiously sneak through the dark tunnels. Bots spots ripples in the sewage at the main junction, which further raises the team's guard. Both he and Tala scout on ahead and locate the pumping room. While water is pumped from this room to clear the drains, they spot catwalks mounted on the walls, which in turn lie directly beneath a grating. Tala climbs up the catwalks and can see from the scum on the walls that when water is pumped into the room that it doesn't raise this high. Not only that, she can hear chatter above! The sensitive bugging device will be able to pick up everything the Imperials say!

After planting the device, the Vipers are satisfied that they have completed their mission and quickly retrace their steps back to the sewer pipe exit. As they approach the main junction, they spot the dead body of a woman in fatigues. Fearful of what may be lurking in the water, they ignore the corpse and hurry on. Tala is last to leave and narrowly avoids being grabbed by a dianoga! 

Tala Nor

Music Cue: Finale
Relieved to complete the mission without having fired a blaster in anger, the team swiftly return to their ship and make their escape! 

Captain Hannah: Excellent work, Vipers! General Reekeene will be delighted the mission went without a hitch! Look what we can achieve when we work as a tight-knit group! I foresee this team will go from strength to strength!

Captain Hannah

Finally, the updated Fakir Sector map shows locations the Green Vipers are familiar with. Note that Tsukkia has been included as this was where Captain Solo dropped off Andews Rolo after the To Free The Forgotten mission (see Episode VI) before then dropping the team off on Nowhere.

Fakir Sector


Closing Reflections:

I enjoyed setting JiBa loose! Now that he's a NPC, who knows what badness he will get up to? Interesting that Corr found it hard to comprehend JiBa's actions, it will be interesting if those two former friends come face to face in the future!

Myles Long was a name that popped up on a Star Wars name generator and I hadn't realised that it was a bit of a joke name until I read it out! We decided to roll with it though, and it provided a bit of unexpected light relief as Imperials constantly thought the team were lying about his existence until they checked the bounty hunter records!

The adventure was fun from the roleplaying side of things, but the lack of action meant the scenario didn't have that classic Star Wars feel. This mission is important to the progression of the campaign though and I didn't much mind the lack of action after the Assault on Repair Station M13 involved 3 sessions of intense and continuous battle, but I think we're all ready for more conflict next session! We'll see what happens next!

I won't be publishing a separate adventure post for GMs as the outline for this mission was better detailed than others in the campaign. You can find below the sewers maps - a players' map and GM map - that I managed to source online. In the key, the locations relate to those given in the Hideouts and Strongholds book, for the Sewer System maps. There is one additional location - 14 - which is simply an antechamber leading in to the Communications Centre. Thankfully, my players didn't try to enter the base so I didn't have to go searching for more maps (it was a large centre so had the potential to go disastrously wrong)! I've also added a few images of the denizens of the sewer, a few of whom the PCs did not encounter!

It may be a good few weeks before there is another post as the next adventure is The Rebels of Chayloon (set on Callonia for my own campaign) by Padre of the Rancor Pit and I expect it will take several sessions to run (potentially it will be split into two write ups as Assault on Repair Station M13 was). This is the first time I'll have ever run someone else's homebrew adventure, but after I read it, I thought it was too good not to play! 

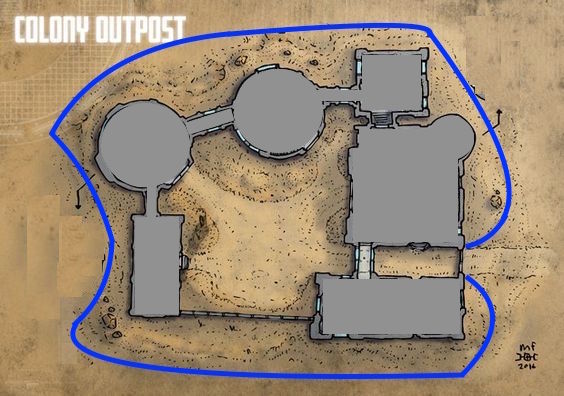
Sewers Map for Players

 
GM Map

Sizinnian


Sewer Robot (who consume sewage)

Dianoga


Star Wars D6: Green Vipers Episode VI

Episode VI - To Free The Forgotten


Introduction:

The Long Shot campaign continues with the short one-shot mission "To Free The Forgotten" which features in the 1st Edition Rules Companion. Please note that I do not own the images contained in this adventure, they were all sourced from Google images. This is a not for profit, advert free blog. Special thanks as always to members of the Rancor Pit for their continued support and suggestions in running this campaign! 

A YT-1300 over Captivity

Spiritual Guidance: 

Music Cue: The Magic Tree (first half, minus the Vader section)
While the team have some downtime on Nowhere, Corr finds himself a quiet room on the labyrinthine ship to meditate. Clearing his thoughts, he reaches out with the force, searching for someone else who will hear his call. To his delight, he hears a response form in his mind.

I hear you. Meet me on the Martinette.

He heads down to the hangar bay where the Martinette, a heavily modified YT-1300 stock freighter that the Vipers seized from pirates on their mission to Masterhome lies. As he makes his way up the landing ramp, he feels the force draw it closed behind him. Inside, he finds General Reekeene's advisor, Santhou. Corr returns Santhou's welcoming bow. 

Santhou: You wanted to see me?

Santhou Lazith'chika 

Corr: Santhou! Thanks fur hearin' me when ah called out! As a child ah wis a member of the Jedi order, taught by Maser Yoda himsel'. Ah wis lucky no' tae have been in the Jedi Temple when Vader attacked. Ah've been in hiding fur many long years, but on mah recent mission ah wis able tae call upon the force tae aid in oor escape from the Empire. Ah want tae resume mah training tae learn more of the ways of the force. Can ye help me?

Santhou: A powerful Jedi was master Yoda. I met him on my travels some two hundred years ago - but I do not possess the same knowledge and understanding of the force that he did. Unfortunately, I am not equipped to train you. I am capable of little more than a few cheap parlour tricks, such as when I closed the entrance ramp to this ship as you entered. The fire of the Jedi has went out of this universe, extinguished by the Emperor's purge. I fear we may never see their like again. I do not believe there is anyone left to train you. However, you may be able to learn more of the force should you find ancient artefacts, or perhaps a vergence in the force. 

Corr: A vergence in the force? Dae ye know where ah can find one?

Corr Alden

Santhou: I encountered one a century ago, in the Cathedral of Mab Ashoto on Fest.

Corr: Fest..is that in the Atrivis Sector?

Santhou: The very same. But some five years ago, I had a vision of that same place. The vergence
was disturbed by two Jedi: a young woman and an old man. By unlocking the tomb which held it, they set the power free, although it rewarded them by granting some of its power. I fear a journey to Fest would be a waste of your time. Instead, you must look elsewhere for such a phenomenon. Should you be in close proximity to one, you will hear it call to you as you did to me. I advise caution, however. Only the most serious mind can unlock the mysteries of the force and I sense much impatience in you, Alden. The Emperor requires no more soldiers. I would not wish to see you become an enemy. 

Corr: Ah huv nae interest in becomin' another pawn of the Emperor. Ah will meditate and seek tae calm mah mind.

Santhou: In that, at least, I can assist you. You may join me in my quarters each day to commune together. Who knows? Perhaps instead seeking enlightenment across the galaxy, it may find us?

Corr: Aye. Thanks fur yer advice an' offer of aid.

Corr stands up and bows to the alien. As he turns away, Santhou's calls after him.

Santhou: One last thing, if I may?

Core: Of course...

Santhou: Would you mind activating the hydraulic ramp close when you exit? Closing it with telekinesis is rather tiring... 

With a nod and a smile, Corr bids Santhou farewell.

Breakfast Brawl:

Music Cue: Mouse Robot and Blast Off
Accompanied by their two droids, Kaleban and Corr attend the mess hall on Nowhere for breakfast. Skye is not joining them as she has a meeting with General Reekeene. They have not seen JiBa since he was put in the bacta tank after Kentara claimed his vengeance for the loss of his wife.

Another squad, who go by the name of Blue Lightning, sit in the canteen, eating their breakfast. As the Vipers enter, they watch them intently and several of them sneer at them. Other than them and the cook droids, there are two Bith engineers, a group of three Duros from Purple Squadron, and a silver-haired old man - who they don't recognise - sits on his own in a darkened corner. He has wrapped his robe tightly around him.

Blue Lightning (l to r): Tala Nor, Janoas Sobari, Uldrir Gonibar, Zuel Zeemor, Krenan Soulreaver & Bots Vridak

Sobari: Well, well, well, if it isn't the Green Vipers! After the stunt you pulled on Mycroft, Kentara should have taught all of you a lesson!

Kaleban: Pfft, Blue Lightning. Did you get a bulk discount when you to bought those fatigues?

Zeemor: Yeah, I know, you're bad. Check your food everyone, could be poisoned. This lot have a taste for killing fellow Rebels. 

Krenan Soulreaver suddenly throws his tray of food across the floor and approaches Corr. 

Soulreaver: Look at the mess you've made, Alden. Pick it up and get me some fresh food!

Corr: Naw, ah'll not pick it up! If ye want food, get it yersel'!

Soulreaver punches Corr, grazing his forehead. Kaleban leaps out of his seat and jabs back at outlaw. Corr meanwhile draws his blaster and fires a stun shot at Soulreaver, missing him. Soulreaver responds by drawing his own blaster and returning live fire back at the pilot! Fortunately the shot misses him - and Uldrir Gonibar, the leader of Blue Lightning intervenes, shouting at his man.

Gonibar: That's enough Soulreaver! Holster your gun or I'll take you out with a stun shot myself! C'mon, let's get outta here. Rebels and Vipers don't mix.

Kaleban shoves Soulreaver away and Blue Lightning exit the room.

Kaleban: Dunno what kind of dumb name Blue Lightning is anyway.

Last to leave, Gonibar pauses in the doorway and, eyes narrowing, cocks his head in Kaleban's direction. Realising Captain Gonibar is not to be trifled with, Kaleban takes a step back before the grizzled leader leaves. 

The Big Shake Up:

Music Cue: Rebel Briefing 
Lens Reekeene has once again convened the the team in the briefing room.

General Lens Reekeene

As the team gather together, they notice that Skye is not there. Fresh from his stint in the bacta tank, JiBa has returned, but, missing an arm, and heavily scarred by Kentara's raking claws, he looks a shadow of his former self. His face pales further as General Reekeene enters the room with three other Rebels, two of whom they recognise as members of Blue Lightning! The last is the silver-haired man from the canteen - who they now see is wearing an Imperial uniform!

Lens: Thank you for joining me. I know these past weeks have been trying for you all, they certainly were for me. First of all, you'll notice Skye is missing. I assure you she's fine, but she is temporarily being assigned to another squad in the Roughnecks. I know you'll miss her and I'm sure you'll share my sentiments in wishing her well with her new team.
Now, moving on to other matters, I've reviewed the situation and come to the conclusion that not only do you require some fresh blood to bolster your ranks, but firm leadership is needed to keep your more...outlandish notions of heroism in check. First of all, allow me to introduce Tala Nor from Naboo-

JiBa: Aw no, not a stupid Cathar! I want reassignment to another squad!

Lens: That's enough from you, JiBa! The Empire are xenophobes, but we're not! All are welcome under the Rebel banner!

JiBa: I'm not a xenophobe - I'm allergic! I'll be coughing up fur-balls! This is the final straw! I quit the Vipers!

JiBa leaps out of his chair and storms towards the exit.

Lens: Very well, but return in a few hours for reassignment, JiBa! 

JiBa waves a dismissive hand at the General before leaving.

JiBa


Lens: I'm sorry about that Tala... 

Tala: Not a problem...now he's gone. By all accounts, he was this squad's biggest problem. It's a relief not to have to work alongside him.

Tala Nor

Lens: Next we have Bots Vridak, a Weequay...

Vridak simply grunts before taking a seat.

Bots Vridak

Lens: Finally, this is Captain Hannah. He'll be leading you from now on...

Hannah: That's right. And the breakfast brawl I witnessed in the canteen was a disgrace to the Rebellion! I've reviewed your records and note that individually you Vipers all have impressive skills! But you lack discipline and cohesion! If you listen to my instructions, perhaps this can be the finest unit in Reekeene's Roughnecks!

Captain Hannah

Lens: I admire your ambition, Captain. Now, your next mission's a bit of a strange one. You'll be leaving the Fakir sector. R3 won't be able to accompany you as he'll be a problem where you're headed. You won't be taking weapons with you either as we need to get you impersonate the Rajah of Virujansi and his personal retinue. Intelligence states that the Imperials are going to make a move on him. Your mission is to insult the Imperials and get yourselves exiled to a moon called Captivity. There's several former senators and persons of interest on that prison planet who we believe will be sympathetic to our cause. Your task is to find them and get them to the extraction point, the mountain peak known as Borolol's Claw...


Royal Welcome:

Music Cue: The Imperial March
Disguised as the Rajah of Virujansi and his advisors, the Vipers are confronted by Major Lariss and a squad of Stormtroopers. As the Major's lieutenants demand the Rajah's compliance in accepting Imperial rule, the advisors offer the Rajah conflicting and contradictory advice, with the Wrathor and the Eye of History making highly offensive comments concerning the Empire's activities. Major Lariss threatens them with being placed under house arrest, at which point the Conciliator points out that the "big nose" has a point. Furious, Major Lariss condemns them to exile on the world of Captivity, sparking apologetic comments from the advisors as the Stormtroopers slap binders on them. Lariss is unaware that he has played directly into the Rebels' hands, instead he is blissfully delighted at the distress he has caused.

Rough Landing:

Music Cue: Inner City
As the drop pod hurtles towards Captivity, Captain Hannah realises that the braking jets have not kicked in and shouts to his team to find the controls to manually activate them. Corr locates a panel which he and C4-S0 pull at, and succeed in shearing off half the panel! Kaleban climbs over his friends in the overcrowded pod and manages to override the computer to activate the jets. The pod touches down gently and Kaleban discovers that there is fuel enough for them to fly the pod into orbit, but no further. 
They decide to emerge from the pod to check their surroundings - and discover they have landed on a ledge on the side of a cliff! Rocks are hurled at them from above by thugs who shout to stop them "getting to Rolo". Hannah orders that they retreat from the attack and make their way down to the caves below. 

C4-S0 takes a tumble as he tries to negotiate the treacherous descent - but Tala catches him! Unfortunately, as she grips on to the droid, the shelf of rock she is standing upon crumbles away! Using her claws to grip the rock behind her, she clutches on to C4's arm until both are pulled to safety by Hannah. 

C4-S0! Thank the maker!

C4-S0

As they close in on the caves, Rolo calls out and draws them inside.

Rolo: Ah my friends, you are very lucky to have landed here! Come inside and warm yourselves by my fire! It's a delight to have such esteemed guests! Those are very fine clothes you are wearing! Tell me your story while you rest your weary heads!

Andews Rolo

Captain Hannah explains that they are Rebels and Rolo suddenly calls his henchmen out of the dark recesses of the cave!

Rolo: Excellent! We'll ransom you to that fool Dedelin and his people in return for some supplies! Seize them! Tie them up!

Hannah: Now don't panic everyone - and don't resist! 

Bots disobeys his Captain as he scoops up a rock and cracks a henchman over the head. Kaleban lunges for Rolo, and manages to twist his muscular arm around the criminal's throat. At the urging of Kaleban's insistent grip, Rolo orders his henchmen to back off. Captain Hannah quietly acknowledges he made a wrong call and praises Kaleban's quick thinking. He then questions Rolo about his past. Under duress, Rolo reveals that he was the leader of the notorious Spectrader Ring who operated on over thirty worlds. He curses the Empire for imprisoning him here on Captivity.

Hannah: I think we all got off on the wrong foot here. We're here to free you from Captivity. I think we can get you off of this world if we just work together. We're looking for other people who may be sympathetic to the fight against the Empire. Would this Dedelin you mentioned - and his friends - be fit that description? 

Rolo: Yes, yes, Dedelin and his friends hate the Empire! But they're terrible people! They attacked poor Rolo and his friends often! They made our life a living hell! If we take you to Dedelin, he may react unfavourably. They hate us.

Hannah and the Vipers see through Rolo's lie - knowing fine well that it is Rolo who has been making Dedelin's life a misery. All the same, they strike a bargain with Rolo that if he takes them to Dedelin, they will arrange for them to escape Captivity along with everyone else. Rolo is highly suspicious and makes Captain Hannah repeatedly promise to get them off Captivity. For some reason, he finds a man's word hard to believe, but on this occasion Hannah intends no double cross.

When they are led to Dedelin's camp, Hannah orders Tala to scout the encampment. 

Kaleban: Let's hope no one throws a ball of yarn in front of her.

Kaleban Maars

Tala makes a spitting hiss in response before she and Bots - who is skilled in stalking himself - head off. With Hannah's permission, Corr heads into the camp alone. Holding his hands up and displaying he is unarmed, he quickly wins the trust of the guards and Captain Dedelin, along with the two Senators in the camp. 

The Vipers all soon enter the camp and arrange for Dedelin and his people to follow them to the extraction point at Borolol's Claw.

Climb To Freedom:

Music Cue: Hyperspace
Despite Tala and Bots identifying the safest route up the mountain, C4-S0, Corr and Bots - the latter of whom is laden down with a makeshift blaster cannon from Dedelin's camp - all struggle to climb to the peak, but with the help of their friends, eventually manage it. The mountaintop is clouded in mist, and when they hear a freighter closing in, realise that they can't be seen! The screech of TIE fighters pursuing the freighter can be heard. Bots quickly hooks up the makeshift cannon and opens fire! He scores several hits, ionising a TIE fighter which drops from the sky and crashes across the mountainside! Bots and Kaleban reposition the weapon just in time as another TIE strafes the area of ground where they'd just stood! 

Keying in on their blaster bolts, the freighter lands and its captain rushes out. A Wookiee's shout can be heard from behind him. The ship is the Millennium Falcon, and its pilot, Han Solo. 

Han: Glad you could make it! But we're a little rushed for time, so if you'll just get on board, we can get out of here.

Corr is first into the ship and rushes in to the cockpit, throwing himself into the pilot's seat. Chewie roars at him from the co-pilot's chair. Solo enters the cockpit and scowls at the pilot.

Han: Let's get one thing straight: only one person pilots this ship. Me!

Corr: Hey! Ah'm no' such a bad pilot mahsel'!

Corr reluctantly gives way to Solo while Kaleban and Bots grab the gunnery chairs. The Falcon quickly fills up with the remaining Vipers and Dedelin's people, but Hannah, with C4-S0 following closely behind, insists that Solo pick up Rolo and his people.

Hannah: I made an oath, Captain Solo, an oath! And I don't intend to break it!

Kaleban and Bots shoot down several pursuing TIEs in the flight down the mountain, buying enough time to pick up Rolo and his reprobates. By the time everyone is on board, the Falcon's holds and corridors are filled with Captivity's denizens!

Solo guns the Falcon into the sky and out of Captivity's atmosphere. Ahead of them, a Star Destroyer closes in!

C4-S0: We'll never outrun that! We're doomed!

Han: Oh yeah? Watch this!

Han and Chewie

The Falcon makes the jump to hyperspace - and escapes! The journey is cramped and unpleasant with the foul odour of Captivity's unwashed former prisoners filling the freighter, but a week later, they return to the Fakir Sector. Solo drops off Rolo's people on Tsukkia before landing on Nowhere. He waves the Vipers goodbye from the landing ramp.

Han: Well, I guess this is it. We'll get Dedelin and his people to Alliance High Command, then we're headed on to Ord Mantell. I think thing'll be less eventful there. See you around...and may the force be with you.

With Dedelin and his people still on board, the Falcon then takes off and, as the Vipers watch from the hangar bay, disappears in a flash of light. 

Closing Reflections:

Another great session with a lot of excellent roleplaying from my players! It was at the request of one of the players that the Green Vipers be disliked by other Rebels on Nowhere as a consequence of their being responsible for the destruction of Bronze Squadron. It proved a good suggestion both in terms of making life on Nowhere far more interesting and in giving me an excuse to introduce a rival team and new NPCs for the Vipers to bounce off of when they are on base. It does mean that even on home turf the Vipers cannot fully relax!

The new characters were all a lot of fun, and all had some moments to shine. Bots Vridak - a Weequay - was suitably gruff and keen to fight rather than surrender, while Tala put her claws to use to save C4-S0 and hissed when Kaleban indirectly compared her to a cat. Both worked together to scout Dedelin's camp while Corr distracted the sentries - clearly the PCs are being slightly more cautious after the M13 debacle! A former Imperial Captain, Hannah was clipped and suitably pompous which is making for a fun an interesting dynamic. He did concede to his team that they were right not to surrender to Rolo and his thugs, but it'll be interesting to see how he will deal with matters if there is continued insubordination, particularly as he has been parachuted into the team to install some order following JiBa's chaotic leadership (same player btw!). Leadership is a really tricky role for any player because the other PCs always have their own ideas and will usually act as they see fit, particularly if what is being ordered goes against their character's personality. It'll be interesting to see how that relationship develops! I'm looking forward to finding out more about all of the new characters, but on initial evidence we have an interesting mix of personalities in the Vipers now!

The opening of the published adventure isn't set out particularly well - the whole objective and reasons for impersonating the Rajah and his advisors are quite poorly explained and, the concern I had when reading over the adventure was realised: I had to provide the team with clearer information than is provided in the text. That said, once they understood their roles and their turns, the exchanges between the advisors and Lariss were a lot of fun and had a lot of great improvisation from the players. I wish I could have remembered it all to set it out here!

The rest of the mission was fine, though lightweight, as shown by the fact that it was completed in a single session. What was most interesting was to see the team dealing with a mission without blasters at their side. They did well and confounded expectations as usual! There was no situation covered in the scenario for offering Rolo and his criminal friends safe passage, but as I believe GMs should, I rolled with their plan! It seemed fitting that the Rebels might even save criminals - and also provides me with the opportunity to reintroduce Rolo at a later date...Will be he an ally or an enemy though?

Note: bizarrely, no stats are provided for Andews Rolo, a major NPC, yet they are included for Major Lariss and Captain Dedelin who the PCs are less likely to fight against!

There were a few fun complications to throw into the mix from "1" results on the Wild Die: the panel in the pod shearing in two and the cliff shelf Tala was standing on while saving C4-S0 crumbling were fun examples of these being put to use! It's not always possible to come up with unique complications, but I feel they always add a bit of unpredictable excitement to sessions when they arise!

One final note: The reference about the two Jedi finding the vergence in the force is a reference to connect the current campaign to the previous one we ran which covered the period 5BBY to 0BBY. The  two Jedi mentioned, Anka and Magnus, were the ones who discovered the vergence in a former Jedi temple. Along with the rest of the party, they ended up so powerful that they managed to survive Vader on two occasions. We agreed that the party had become such a thorn in the Empire's side that they would be the central focus of the Emperor's machinations - so the Rebels sent them out of the galaxy for bringing too much heat on their fledgling Rebellion. I may at some point retell those adventures on this blog as well as publish the adventures (most were homebrew). For anyone interested in reading those adventures, please join the Star Wars Green Vipers Group on Facebook and look at the Photo Albums: all 52 episodes in that campaign are summarised there.

Thanks as always for reading!


Star Wars D6 Adventure: Assault on Repair Station M13

Star Wars: Assault on Repair Station M13


Introduction: This adventure is intended for the Star Wars D6 RPG system and expands upon the outline provided in the Long Shot Campaign adventure of the same name - which can be found in West End Games' Classic Campaigns supplement. A copy of this supplement, the Hideouts and Strongholds supplement and Star Wars REUP rules, the latter of which is *available here* is assumed before play begins.

Please note that I do not own the images contained in this adventure, they were all sourced from Google images, although I have altered some of them to provide information. This is a not for profit, advert free blog.

Special thanks to members of the Rancor Pit for their continued kind words and support of these posts!


The "Bus" rolls into Repair Station M13


Expanded information on the adventure outlined in the Classic Campaigns supplement. Note that it assumes the players have already completed the first two missions in that supplement (Tests of the Godking and The Heat of Freedom). Note also that the TIEs mentioned in the Campaign Outline only fly out to respond to the attack on an orbiting Space Station - and not out of system as stated. This never worked for me as TIEs do not have hyperdrives, nor the fuel capabilities to travel to other systems. This will ramp up the pressure considerably - but has the potential to allow the PCs to get involved with a fun climax, attacking the space station! The time scales are a little tighter too, but again, this helps ratchet up the pressure - although they will have plenty of time to take apart the Repair Station before a Star Destroyer arrives.


Only GMs should continue reading!


Assault on Repair Station M13 Mission Briefing:


General Lens Reekeene, her husband Mikka and her alien advisor Santhou summon the team to debrief them ahead of their mission.


Lens Reekeene: Since we set up base here, I've been gathering intelligence and working towards a larger goal. Operation Retribution - which is due to take place soon - represents the fruition of those endeavours. The plan is to hit a variety of Imperial operations across the sector. 

Once the operation is underway, the Empire will be overwhelmed by the simultaneous attacks. That’s why I’m assigning you to a mission on Mycroft. Santhou will explain the details…


Lens Reekeene


Santhou: Thank you General. In orbit around Mycroft is a space station which will be targeted by Bronze squadron; but on the surface, there is a refuelling depot. Our intelligence suggests that the outpost is home to approximately fifty staff. However, we expect that most of these are civilians who are neither trained soldiers, nor likely to wish to become embroiled in any firefight. 

Beneath the outpost, a small hangar bay is built into the side of the cliff where space craft can be refuelled. Intelligence indicates that it houses three TIE fighters which we expect to be scrambled to respond to our attack on the space station. If at all possible, we want you to disable those TIEs before they have the chance to launch, but it is not mission priority; our flyboys should be able to handle such puny opposition. Keep in mind though that if an alert is raised before our attack, not only could those TIEs be scrambled, but further fighters could be deployed from the space station to end your incursion. I do not need to stress how deadly strafing TIE fire may be should you be caught out in the open.
Once the Bronze squadron’s attack is underway, the Empire will be unable to send reinforcements to the planet for a further twelve hours…


Santhou


Lens: Giving you plenty of opportunity to act. Your mission is to harass the outpost, capture prisoners for interrogation, steal supplies and weapons, and, if possible, destroy the entire outpost. Hit hard, maximise damage at minimum risk, and make sure you get out of there after two days. Try to bring everyone home alive! May the force be with you.


As well as the items set out in the Outfitting section of the outline, Captain Hark'r will provide the team with data terminals to download data if they are able to access the station’s Command Centre.


Now that the mission is about to get underway proper, you can use this video opening scroll to get the players into the Star Wars headspace!


Deadline on Mycroft:


As set out in the outlined adventure with the following additional detail:


It occurred to me that the workers on the Repair Station would live somewhere close by. Down in the valley below the mountaintop Repair Station is a small settlement called Restitution. There is a clearing wide enough to land several ships, so the Long Shot can touch down there.


The village sheriff, Laurent Rockoki, a grizzled old man will approach them and ask their business. Rockoki isn't particularly suspicious and will welcome the players to their village. He can provide them with the following information:


The settlement was built for the workers but is not well supplied. The food is bland and they need more generators; the power often goes down in the village. He will welcome anything the PCs can do to improve their conditions.

There is a small cantina where workers often congregate for well-earned refreshments. 

The workers carry out 12 hour shifts. One shift is taken to the Repair Station on the "bus" which then picks up the workers finishing their shift and takes them back to the settlement. The drive up to the Repair Station up the winding roads of the valley takes an hour.


The PCs have various options now: 

Scout: they can hike up the valley and scout the base from the surrounding forest

Disguise/Infiltration: disguise themselves as workers or, if they ambush some of the patrolling Stormtroopers, disguise themselves as them to gain entry to the base. Note that if they try the cantina, the locals will be suspicious of any PCs who openly speak out against the Empire (their employer) - and report them to patrolling Stormtroopers who will arrest them and then take them to the Repair Station for interrogation. 

Climb: Another option would be to scale the cliff-face to gain access to the hangar. This would require three climbing rolls; Easy, Moderate, and Difficult as the rocks become more sheer and the climb becomes progressively harder as they close in on the hangar.

The Long Shot: They can simply use the Long Shot to attack the outpost, but this is likely to end in disaster.


The Repair Station:


As outlined in their briefing, the Repair Station is built on a cliff edge. There are a number of buildings constructed above ground, but the hangar bay which has berthings for 12 TIEs, is built into the side of the cliff-side, 50 feet beneath the station.


This first map illustrates the area around the base. It can be used if TIEs are scrambled and the team involve the Long Shot in their battle. 

Special thanks to Robert McCormack for creating this image. (Fans of this campaign will better know him as Jimi Ackbar and now Corr Alden.)


The Repair Station & Surrounding Landscape

The second map and third maps illustrate the section of the Repair Station which is above ground. The first hides the detail of the interiors from the players.


Repair Station Exterior

Repair Station Interiors

The fourth map shows the hangar bay. Note that on Roll20 there are resources to populate this with TIE fighters and freighters to your own personal tastes. Be sure to leave the TIEs plenty of space to move out from their berthings!


Hangar Bay

And the GM maps. The key for these follows.


Repair Station M13 GM map.


Repair Station M13 Key (1-9):


1: Main Gate: 2 Stormtroopers are always on guard here. They have keycards which, if the PCs try a head on attack rather than sneaking in, can manually open the outpost’s doors.

2: Workers recreation area. Nothing particularly of interest here, unless the PCs want a game of holochess.

3: Tool shops: Full of equipment which can be used to repair any vessel landing in the courtyard between the buildings, but more commonly used for Repulsorlift Repair and for the bus.

4: Vehicle station: This is where the refuelling tanker is parked. There are stairs up to location 9 or down to the Hangar location 11. Between 4-5 is a corridor which has doors into and outside of the compound. One Stormtrooper is usually stood outside the doorway, looking to the woods. Again, he has a keycard to open doors in the base.

5: Command Centre: If the base has been alerted to the attack, the entrances to this area will be locked down. Several Imperial Officers and base workers can be found here. This is the central hub for communications, sensors, fuel regulation for the tanks in the hangar below, the electrified fence, remote links to the two turbo-lasers which protect the base (found on locations 9 and 19), and for security cameras around the base. There is also a stairwell leading down to a sub-level (not illustrated) into a large dormitory for the station’s support personnel.

6: Conference Rooms: Some of the base’s staff may be found here - but they will flee to the command centre if the alert has been issued.

7: Vehicle pool. The outpost’s 3 Repulsorlift Transports with Repeating Blasters can be found here.

8: Observation Spire: Overlooks the forest. Always manned by one Stormtrooper. There are stairs down to the Hangar on location 10.

9: Turbolaser Spire: The main defensive weapon for the upper level of the base- can attack incoming vessels. Again, one Stormtrooper is always here, manning the gun.


Hangar Bay GM Map


Hangar Bay Key (10-19):

10: Stairway down from 8.

11: Stairway down from 4.

12: Supply crates: Full of food, medical supplies and blasters - just what the Rebels have been asked to find.

13: Fuel Pods: There are the three pods as seen plus another three far larger silos suspended above this chamber. If these are blown up, they will destroy the support staff dormitories and control dome above them. In addition, the fuel pumps in this room lead cut through rock into the hangar bay’s refuelling stations: those stations will essentially become massive flame throwers filling the hangar with liquid flame! The repair station will be, to all intents and purposes, destroyed if these tanks are blown apart.

14: Power Generator Room: Destroying this will shut down all power across the outpost. Doors will be permanently closed and only red emergency lighting will illuminate the dark corridors throughout the base. (-1D to Ranged Combat unless PCs have infrared scopes).

15: Cafeteria: Where all of the staff are fed. Plenty of food rations to be found here.

16: Stormtrooper Dorms: Beds and some personal effects can be found, but nothing much of interest. These are positioned close to a corridor which leads out on to a catwalk above the main hangar. From that catwalk, the pilots can climb down ladders into the TIE fighters (should they be there).

17 & 18: Stormtrooper recreation facilities. Again, nothing of note here. If the TIEs are still in the hangar, 12 TIE pilots will either be here or in the Dorms.

19: Main Hangar: Two Stormtroopers watch over the bay. There are two sets of TIE racks in this room, each holding 6 TIEs each (though only one is illustrated). Unless the PCs attack once all TIEs have been scrambled, these begin loaded. 6 TIEs are in the racks - and the other 6 are in a second rack held in a recess in the wall. The first rack has to be emptied before the second recessed rack moves forward into position. TIEs are accessed from the catwalk above: ladders lead off the catwalk, allowing TIE pilots to descend into the fighters beneath. TIEs enter and exit by the opening in the cliff edge to the south. A turbo laser battery is also positioned at the south east corner. 


Security: When the base goes into lockdown (Stage 3), doors will require successful Security rolls to be opened. These will be Easy rolls, but Difficult rolls will be required to open doors to the Control Dome, Fuel Pods and Power Generator.


Computer Programming: When accessing the Control Dome, the PCs can attempt to access the computer system. It requires a Very Difficult roll to unlock the computer and access data for the Alliance. Of course, perhaps the base’s Commander may be persuaded into unlocking the information for the team!


Stealing the Data!


Data: The control centre’s computer has details of extensive communications with several Imperial outposts across the Fakar Sector - specifically bases on Vakkar, Doneer’so, Sinkar, and a Communications Centre in Takari city on Iyuta. This last will be of considerable importance to Lens Reekeene who will want to bug the communications centre - a clear narrative hook into the Long Shot adventure called “The Plant”. Any of the Imperial Officers can also confirm this information.


The TIE problem: The intelligence that Reekeene’s Roughnecks had which suggested there were only 3 TIEs in the base was way off; there are 12! This means that the impending attack upon the space station in orbit is in very real danger. Note that there was no failure of intelligence, it's simply a case of the base having received a fresh squadron of TIEs for maintenance since the recon mission was carried out.


The Attack:


There are a few options the PCs have here; they could sabotage the TIEs, attempt to take control of turbolaser batteries and shoot some down as they blast off, use the Long Shot to battle them (unwise!), or even hijack a few of the TIEs! Imagine the confusion among the TIE ranks if the hijacked fighters in their own ranks suddenly begin firing upon them and even assist the X-Wing attack on the station!


The Final Battle:


Attack on the Space Station!


The Space Platform stats on page 116 of the Hideouts and Strongholds book should be used for the Space Station. The main concern for the PCs will be the 4 Turbolasers and the Concussion Missiles battery (8D damage omitted from stats) as well as the 8 TIEs defending the base. 8 X-Wing fighters will be arriving for the attack and should destroy the defending TIEs on a roughly 2-1 basis (depending on how easy or difficult you want the attack to be for your PCs). If the PCs have joined the TIE squadrons, it will take both the base and the TIE fighters several turns to identify the enemy in their own ranks. X-Wings and any other non-imperial vessels will be prioritised targets in the defence of the space station, but once it becomes obvious which TIEs are wreaking the most havoc, those too will be targeted. In terms of the destroying the base, the 4D Hull on the station is equivalent to 10D against Fighters and has 2D of added shields, meaning that the Rebels will want to target specific points on the station to maximise damage. 


If they open comms to the X-Wings, they can be told of the targets to hit - but a successful Technical Roll will also reveal the same information (Note that one piece of information can be revealed for each difficulty the roll achieved - i.e. a roll of 13 equates to a Moderate roll, revealing 3 pieces of information). The X-Wings are better placed to attack the platform as they have Proton Torpedoes. If the PCs open comms to them, they will explain this and request that they cover them during their attack runs.

  1. Shield Generators - Taking out any one of these will knock out the Shields on that side of the base. All must be disabled to leave the base open to attack from all sides.
  2. Command Bridge - If the Command Deck is destroyed, all defences are compromised as sensors go down (remove Fire Control bonus for Turbolasers). TIE fighters may be less effective in identifying threats as the squadrons are no longer being coordinated from the Bridge.
  3. Environmental Controls - these regulate the base’s air and gravity. Destroying them effectively wipes out the entire base (although it will take several hours for the air to run out)
  4. Fuel Tanks - if these heavily armoured tanks can be breached (12D Hull against fighters), they will cause an explosion which will tear through the entire station and cause it to explode!
Space Map: 

TIEs scrambling from Repair Station M13 will enter from the left. Fighters and even freighters will be extremely small on this map so set your scale accordingly! 

Map for Space Station Attack

Fallout: If the PCs disobey orders and attack too early, Bronze Squadron's attack may be compromised. This will shake their general's faith in them. See the write up for this adventure elsewhere on this blog to learn of some consequences you may like to build into the scenario. We are playing a gritty Rogue One influenced campaign, so the notion of Lens Reekeene having Rebels tortured may not be appropriate for many groups. 

Note: You can also see from that write up images which illustrate how I populated the base and positioned Stormtroopers etc.


Strontium Dog Miniatures Game - Mutant Army Generals

Mutant Army Generals Strontium Dog Mutant Generals Image (c) Warlord Games Along with the Kreelers, one of the last sets that was released f...