X-Wing Galactic Civil War Episode III: Dathomir

Welcome to the third instalment of our X-Wing Campaign! If you want to read the campaign rules, please go here! And to read Episode I, click here - and Episode II can be found here!

On Turn 3 of the Campaign, the Empire, perhaps drawn to the strong presence of the dark side of the force, attempt to take Dathomir. They send forces to take the world, seeking avoid another failure such as they suffered on Dantooine.

The Galaxy Map at the start of Turn 3
Located in the Quelli Sector of the Outer Rim, Dathomir is an uninviting world which is perpetually bathed in a red mist. The world's most famous natural inhabitants are the Rancor; huge vicious creatures to some, most valued of pets to others.

Dathomir

With both forces on Renown of 2, they can both field ships with Pilot Skill 1 or 2.

Both opt to use the same forces as matched each other over Dantooine, with the Rebels bringing 3 X-Wings and a U-Wing to the fight...

X-Wing Build x3
U-Wing Build
...while the Empire sends a TIE Defender, 2 TIE Interceptors, a TIE Bomber and a TIE Fighter to deal with enemy Rebel ships.

Can the Empire strike back?
Set Up. The Imperials once again pack their TIEs in a tight formation. The Rebels seek to negotiate the asteroids in an attempt to flank the TIE line.

Set Up
Turn 1: Rejecting the hesitant opening of the previous battle, the Imperials move their ships to attack speed and launch a vicious assault upon the closest X-Wing! Caught off-guard and out of position, the X-Wing loses all of its shields and its astromech!

TIEs swarm forward to engage the closest X-Wing!
Turn 2: The Rebels swoop around and a hail of deadly fire is exchanged between both formations! One TIE Interceptor bumps the U-Wing and is fortunate not to suffer damage or ionisation from the U-Wing! The other TIE Interceptor suffers 2 damage including a critical hit which states that if the ship lands on an asteroid or bumps another ship, it will suffer 1 damage and be destroyed!

Turn 2 post-movement
The TIE Bomber unleashes Cluster Missiles at the U-Wing but somehow the ship manages to sail through the deadly barrage! It cannot escape an attack from the TIE Defender though as it strips 3 shields! Interceptors concentrate their fire to destroy the lead X-Wing!

There's...too many of them!
End of Turn 2
Turn 3: Struggling to get back into attack position, the Rebels are in disarray with no ships able to fire this turn! The Empire press their advantage and strip another X-Wing of all shields and destroy its astromech! The Bomber once again contrives to fail to land a single hit with the backup cluster missiles! Only its primary weapon is left now...

End of Turn 3
Turn 4: The TIE Defender and TIE Bomber close in on the X-Wing while the Rebels are reduced to shooting at range...

Turn 4 Post-Movement
...but they make it count, somehow destroying both TIE Interceptors! Already on the brink, the X-Wing cannot evade such heavy fire from the Defender and Bomber and it too is destroyed in the exchange!

Turn 4 is deadly for both sides!
End of Turn 4
Turn 5: The TIE Bomber suffers an incredible four damage from the X-Wing!

End of Turn 5
Turn 6: Both forces try to regroup but the TIE Fighter is ionised after it bumps the U-Wing...

End of Turn 6
Turn 7: More repositioning. The TIE Fighter bumps the U-Wing but suffers no damage (the ion token should not be there). The TIE Defender and Bomber manage to inflict more damage upon the U-Wing from afar. It only has 3 damage left!

End of Turn 7
Turn 8: Both sides are able to attack but do little to the other...

Turn 8 Post-Movement
...except for the lone TIE fighter which inflicts 2 critical hits on the U-Wing!

The U-Wing takes 2 crits! Can it survive?
One of the crits on the U-Wing is a Minor Explosion! The damage dice is rolled and it suffers another hit, destroying it in a spectacular explosion!

Critical Roll!
End of Turn 8
Turn 9: The TIE Fighter comes under fire but hangs on in there!

End of Turn 9
The Imperial Fighters swarm around the last X-Wing, looking to deliver the killing blow - but all three are on the brink with only one damage left! The X-Wing attacks, targeting the deadly TIE Defender...

Turn 10 Post-Movement
...and obliterates it! An instant before destruction however, the TIE Defender looses a final volley - and eliminates the last X-Wing!

End of Turn 10
The Rebels are defeated! Glory to the Empire!


The Imperial flag flies over Dathomir on the galaxy map!

Current Renown: Imperials 3, Rebels 2.
Note: This means Imperials can field ships with PS3 or lower next battle, Rebels PS2 or lower.
It will be the Rebels' turn to attack next but on the next Imperial turn they can attempt to unlock one of their pilots!

The Galaxy Map at the end of Episode III
Watch this space for Episode IV - coming soon!

X-Wing Galactic Civil War Episode II: Dantooine

Welcome to the second instalment of our X-Wing Campaign! If you want to read the campaign rules, please go here! And to read part one, click here.

On Turn 2 of the Campaign, Rebel intelligence identify that Dantooine would make an excellent regional base of operations and move to secure the system. The Empire send forces to engage the Rebel fleet and stymie any sense of hope that a Rebel victory may inspire across the galaxy.

Galaxy Map at the start of Turn 2 Dantooine is on the extreme left of the board
Located in the Raioballo sector on the outer rim, Dantooine is a pleasant world of grasslands, rivers and lakes. It has a small population, mostly living in small communities. The world has no industry or advanced technology.

A Rebel Vessel approaches Dantooine
After victory went to the Empire in the first battle, the Imperials' Renown is 2, meaning they can field Pilots with Pilot Skill of 1 or 2 while the Rebels are still restricted to Pilots of Pilot Skill 1.

The Rebels are fielding 3 X-Wings and a U-Wing. In the opening skirmish neither the Rebel and Imperial player were aware of the improvements made to the X-Wings as a result of the Saw's Renegades set. Today's Rebel player is hoping to make the most of those changes!

X-Wing Build x 3
U-Wing Completes Rebel List

After their success in the opening battle, the Imperials are once again bringing a TIE Defender and two TIE Interceptors along with a lone TIE fighter, although this time they will call upon a TIE Bomber armed with missiles to complete their force.

Imperial List

First of all - apologies, we were so eager to get on with the game that we neglected to take pics of the set up and first two turns! We did realise in time to at least note down what happened...

Set Up. The Imperials set up in a row of five on the edge of their baseline (board edge) while the Rebels set up their three X-Wings and U-Wing in a row opposite, although in their case, at the edge of the range one set up space.

Turn 1: Both sides moved cautiously forward with no ships coming into firing range.

Turn 2: The U-Wing pushed forward and the TIEs hit it with everything they could, stripping it of shields! The Rebels targeted the TIE Defender, stripping its shields and inflicting 1 point of damage!

Photos capture the acton from Turn 3 onwards...

Turn 3: With the Rebels holding initiative and moving first, concern about X-Wings making Speed 1 manoeuvres to block resulted in the Imperials opting not to make K-Turns. The Rebel player quite brilliantly anticipated this and put 2 of his X-Wings on K-Turns to get behind the bulk of the Imperial line! The 2 Interceptors are out of arc this turn as is the Rebels' U-Wing...

Turn 3 Post-Movement: X-Wings get the jump on the Imperials!
The TIE Bomber launches a devastating attack as Cluster Missiles hammer the nearest X-Wing, stripping it of shields and inflicting heavy damage - the sacrifice of the integrated astromech is all that saves it from destruction! The Defender and TIE Fighter strip the shields of the X-Wing before them...

...but the Rebels destroy the TIE Defender! It's a huge setback for the Empire early on in proceedings!

The TIE Defender is obliterated!
End of Turn 3
Turn 4: The Empire strikes back! The Interceptors and TIE fighter perform K-Turns and, backed up by the TIE Bomber strip all shields from enemy fighters as well as destroying their astromechs! More importantly, an X-Wing is destroyed!

An X-Wing Rookie is Roasted!
The Rebels by comparison have a poor turn as an X-Wing and the U-Wing cannot fire. The X-Wings are unable to land any blows on their enemies.

End of Turn 4

Turn 5: The Rebels adjust their flight patterns to reposition.  The U-Wing inflicts damage on the TIE fighter.

End of Turn 5

Turn 6: A series of bumps work out in the Rebels' favour. The Empire inflicts no damage this turn - but the TIE bomber suffers a massive 5 hits while one X-Wing finishes off the TIE fighter from range!

Whoa! That got him!
End of Turn 6
Turn 7: The Imperials come around again. They desperately need to mete out some punishment this turn to get back into the game!

Imperials have good position - but so too do the Rebels!
But they can't land a single hit! The Rebels have no such problems however as one Interceptor takes two hits and the other is destoryed!

Scratch a TIE Interceptor!

Turn 8: The last TIE Interceptor bumps the U-Wing, triggering the anti-pursuit lasers! A hit is rolled and the Interceptor is vaporised! The TIE Bomber gets into range but fails again to land any damage! It, in turn suffers heavy returning fire and is destroyed!

Turn 8 Post Movement

"Outstanding Red Team, outstanding. I'll getcha a crate of beer for that one." 
The Rebels are victorious!


The Rebel flag flies over Dantooine on the galaxy map! Having scored their first success against the Empire, Mon Mothma issues an impassioned call for people across the galaxy to rise up against their Imperial oppressors! Various Rebel cells soon after rendezvous over the regional base of operations on Dantooine and for the first time the entire Rebel fleet is assembled!

The Galaxy Map at the end of Episode II
Can the Rebels build upon their success? Find out in Episode III - coming soon!


X-Wing Galactic Civil War Episode I: Ilum

War! In a stunning move, the fiendish Emperor Palpatine has all but eliminated the guardians of peace and justice in the galaxy, the Jedi Knights. 

The Old Republic has been replaced by the evil Galactic Empire. Several thousand solar systems have declared their allegiance to the Empire. Now, with the aid of his apprentice, Darth Vader, the Emperor seeks to bring the rest of the galaxy under his rule. 

The hastily assembled Rebel Alliance have declared their intention to fight to restore freedom to the galaxy. Over the ice world of Ilum, a small band of Rebels engage swarming Imperial TIE Fighters in a desperate bid to secure their first victory against the evil Empire...


Welcome to the first of what will be a great many campaign logs! If you want to familiarise yourself with the campaign rules, please have a look here.

On Turn 1 of the Campaign, the Empire moves to seize control of Ilum, a world which, due to its vast supply of kyber crystals, was one of (if not the) most sacred place to the Jedi. Realising the importance of the world, the Rebels send a fleet of ships to contest the world and begin the Galactic Civl War...

Ilum is located in the Unknown Regions of the galaxy (bottom left of the galaxy map).

Note that there are certain pilots associated with particular locations which may be unlocked as the campaign progresses, but this will not happen until later on...

The Galaxy Map
Planet Ilum
In this opening encounter, both sides will be fielding 100 point forces. Both sides start the campaign with Renown of 1, meaning they can only field pilots with a Pilot Skill of 1. Note that it is 1st Edition X-Wing Miniatures Game rules which are being in this campaign.

First up, the Rebels are bringing 2 A-Wings and 2 YT-1300s - a stock YT-1300 and customised YT-1300 - to contest Ilum. The Hotshot co-pilots on the YT-1300s ensure that the Imperials will not be using Focus tokens in this battle.
Rebel List Part 1
Rebel List Part 2
The Imperial list. They are bringing 3 TIE fighters, 2 TIE Interceptors and a TIE Defender to wipe out the Rebel scum...
Imperial List Part 1
Imperial List Part 2
Set up. The Imperials send their TIEs into battle in a tight formation. The Rebel force is split in two.

Set Up

All pictures that follow show the state of play at the end of a given turn.

Turn 1:

Both sides accelerate to attack speed but remain out of range. The Rebels hastily try to regroup, a YT-1300 and A-Wing having to navigate a treacherous grouping of asteroids over Ilum.

Turn 1
Turn 2:

The stock YT-1300 connects with an asteroid! There's no damage but it can't fire this turn! Worse still for the Rebels, neither too can the A-Wings which are out of arc. The customised YT-1300 inflicts a hit on one of the TIEs - but the return fire from the TIE swarm is devastating, stripping all shields and inflicting damage!

Turn 2
Turn 3:

The blue A-Wing swings around the TIE swarm - only for the swarm to perform a unified K-Turn and shoot it from behind! The A-Wing is blown apart while the Rebels still struggle to get into the fight!

They came from behind!

But the custom YT-1300 inflicts a critical hit on a TIE Interceptor - it must avoid hitting other ships or asteroids otherwise it will suffer more damage!

Turn 3
Turn 4:

As the A-Wing finally gets into position to fire, a TIE pilot wilfully - for position - causes a pile-up of squad-mates by barrel rolling to block those behind it. Crucially though, the green manoeuvres clear all of their stress. The stock YT-1300 annihilates a TIE fighter...

A TIE goes down in flames!

...but the TIE Interceptor and TIE Defender respond with a deadly volley which destroys the modified YT-1300!

Turn 4
Turn 5:

The A-Wing and remaining YT-1300 reposition as the swarm swings around again for another pass! A few shields are stripped but most volleys miss intended targets as the ships pull off complicated manoeuvres.

Turn 5
Turn 6:

The damaged TIE Interceptor makes a terrible misjudgement, hitting an asteroid! It takes automatic damage because of the effects of the critical damage card...

Intercepting an Asteroid!

...and rolls for damage for hitting the asteroid! A further hit destroys it!

Wipeout for the TIE Interceptor!

The TIEs and TIE Defender strafe the stock YT-1300, stripping more shields. The Rebels are unable to land damage on the (somewhat fortunate) TIEs which evade the incoming fire!

Turn 6
Turn 7:

The A-Wing surges forward but finds itself without a target as the closest TIE bumps it. The incoming Imperial fire takes the A-Wing and YT-1300 to the brink of destruction while the Imperials continue to evade the return fire from the YT-1300...
Turn 7

Turn 8:

TIEs bank across one another and both sides exchange fire once again - perhaps because of the heavy damage the Rebels have suffered, their shots once again go amiss! The Empire's pilots are more accurate and deadly - destroying the last two Rebel ships!

Moments from destruction before the end of Turn 8
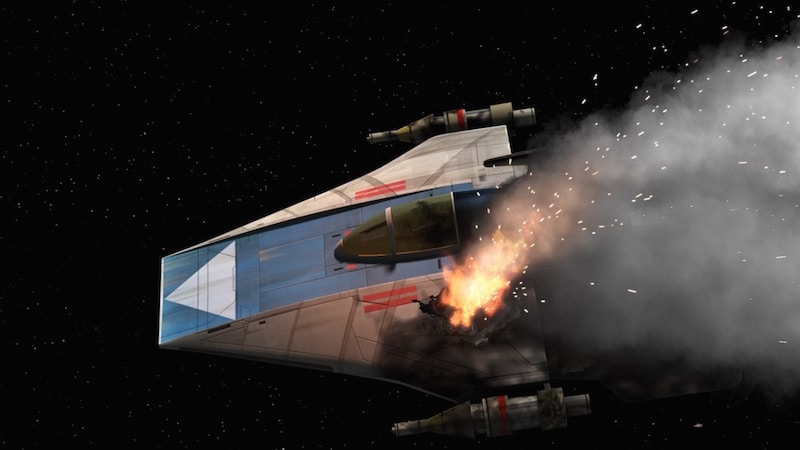
The remaining YT-1300 is destroyed in a spectacular explosion!

The first battle of the Galactic Civil War sees the Empire emerge as victors! Their Renown increases to 2, allowing them to field ships with PS2 or lower next battle. The Rebels will still only be able to pilot ships with PS1.


Ilum has fallen to the Empire! Little do the pathetic band of Rebels realise, this world will one day become the site for Starkiller Base! But that's a tale for another time (and a later war)...

The Imperial flag is now flying over Ilum on the galaxy map!

Galaxy Map: End of Episode I

This was only the first skirmish in what will be a long and punishing campaign. Watch out for Episode II coming soon!

Strontium Dog Miniatures Game - Mutant Army Generals

Mutant Army Generals Strontium Dog Mutant Generals Image (c) Warlord Games Along with the Kreelers, one of the last sets that was released f...