SHIP: THE BLACK MARIA
CAPTAIN: JACE DOLMAN
CREW: JAY "LARS" LARSEN, ELI RENTON
PRIMARY OBJECTIVE: FIND SHIP PARTS TO REPAIR SHIP GENERATOR
SECONDARY OBJECTIVE: SALVAGE GEAR
SET UP
This mission is a standalone mission and is available for free from Battle System's blog and/or newsletter.
*UPDATE 25-4-19: After reading this Battle Report, the fine fellows at Battle Systems reached out to mention to me that once the generators are reactivated, so too are the life support systems, and therefore so too is the air. This means that the scenario rules - about potentially suffering Health Loss for making Double Move Actions and losing a point of health as the Hostility Level increases - no longer apply. Also, "you can take any zero items" with your crews (in an act of staggering stupidity, I brought no weapons or equipment and struggled on as you'll see below) - which means you can have your characters bring Med-Stims which will become vital later in the fight. That said, they agreed that this mission probably is better suited to an experienced crew with more skills and good weapons to fight back with from the get go! Thanks again to the team for providing excellent feedback which will hopefully help me and fellow players for future sessions!
*UPDATE 25-4-19: After reading this Battle Report, the fine fellows at Battle Systems reached out to mention to me that once the generators are reactivated, so too are the life support systems, and therefore so too is the air. This means that the scenario rules - about potentially suffering Health Loss for making Double Move Actions and losing a point of health as the Hostility Level increases - no longer apply. Also, "you can take any zero items" with your crews (in an act of staggering stupidity, I brought no weapons or equipment and struggled on as you'll see below) - which means you can have your characters bring Med-Stims which will become vital later in the fight. That said, they agreed that this mission probably is better suited to an experienced crew with more skills and good weapons to fight back with from the get go! Thanks again to the team for providing excellent feedback which will hopefully help me and fellow players for future sessions!
The scene is set for a race against time on a derelict spacecraft - the air is running out which means Jace and his crew will start losing health as time goes on...all at the same time as the threat from the Purge increases!

A closer look at the map. Two sets of ships parts are hidden in one or two of the crates (I honestly didn't know where before playing; I hate the idea of cheating so you can be sure everything reported here is played the way it happened in the game.
Once the ship parts are found, they must be taken to the generators at the top right of the map to restore the life-support systems on the derelict ship. At this point, the team can return to the airlock and escape. With restored life-support, the crew of the Black Maria will be able to return to the derelict ship to salvage more parts during a campaign. Very handy if the mission is a success!
Once the ship parts are found, they must be taken to the generators at the top right of the map to restore the life-support systems on the derelict ship. At this point, the team can return to the airlock and escape. With restored life-support, the crew of the Black Maria will be able to return to the derelict ship to salvage more parts during a campaign. Very handy if the mission is a success!

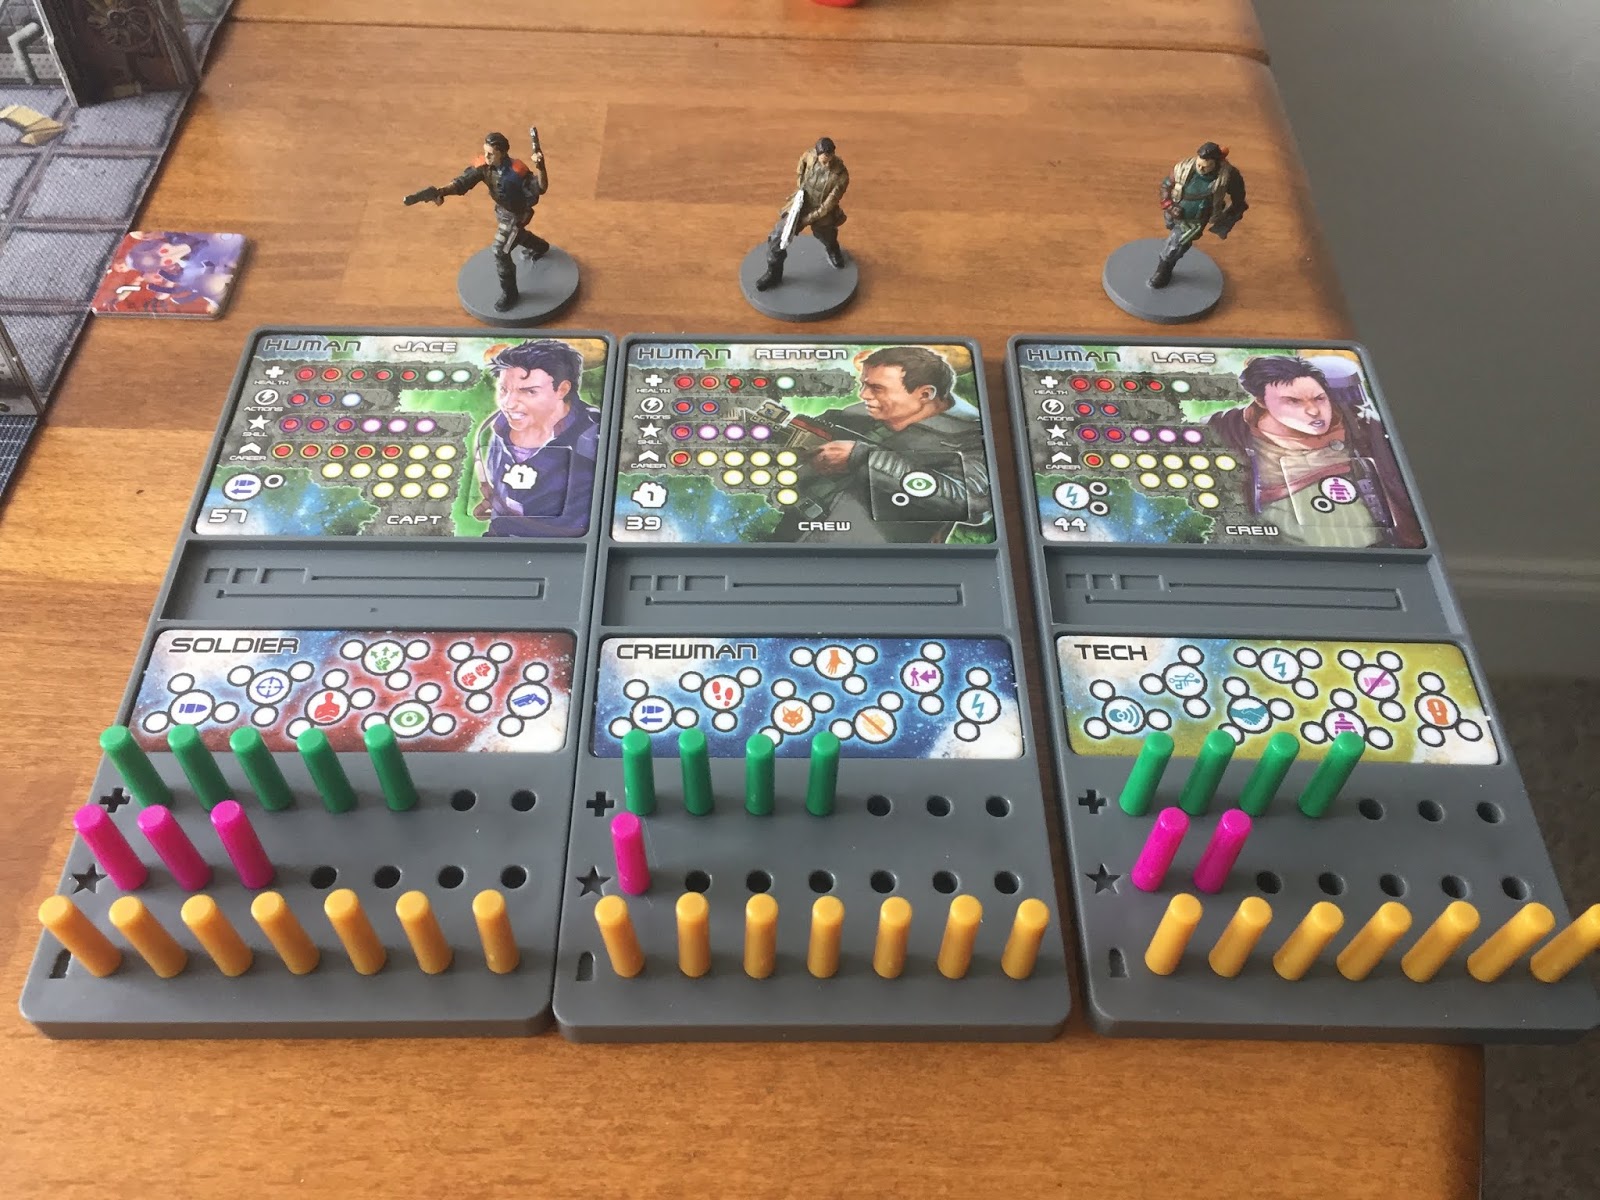
As mentioned above, I've selected Jace, Renton and Lars for this mission. I finally got some dry wipe markers to allow me to fill in the slots on their character boards! I'm starting the crew from scratch so there are no career path slots to be filled. Perhaps if they survive this mission, that can be arranged!
The crew take their first tentative steps on to the ship, ready for action!

ROUND ONE
I have to spend a Skill Peg from Jace's character to clear the condition card. It is at this point that I realise that I have not armed the characters but I decide to run with it just to see what happens!


Limited by the mission parameters, the characters only take one Move action this turn and instead conduct searches which does succeed in providing them with some weaponry - they'll need it!


Another stroke of luck is that the Purge dice come up blank - no sign of them at the moment!
ROUND TWO
Nice event card which provides me with a large weapon (I rolled a 2 on the Chance die) for Renton!

All three crew make a single move and then a search. Jace opts not to take the basic pistol as his eyes are on the prize of the nearby crate but the others take what they find.


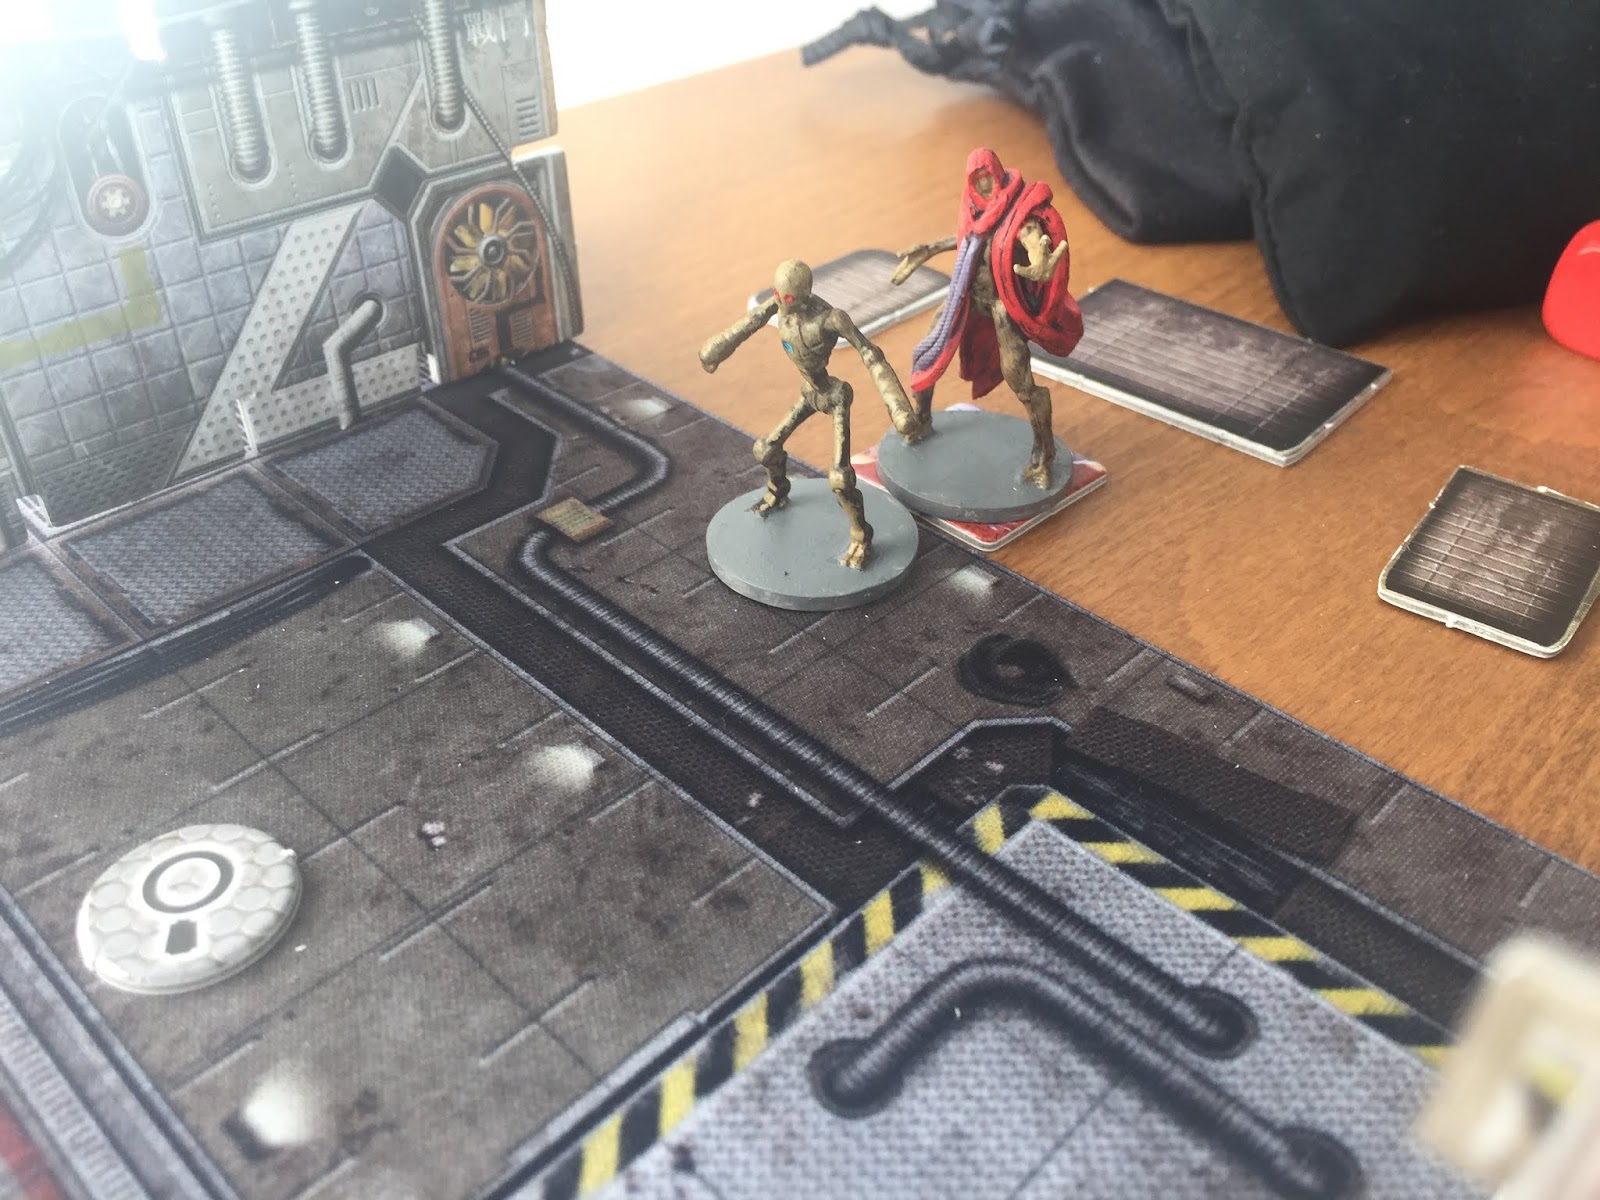
A Devastator enters play. It is unaffected by the lack of air as the Purge are robots. With linked actions, and because there are no visible targets, it makes a double move. Lars is technically closest but the route to Lars is long; Renton is the one who will have to watch his back!

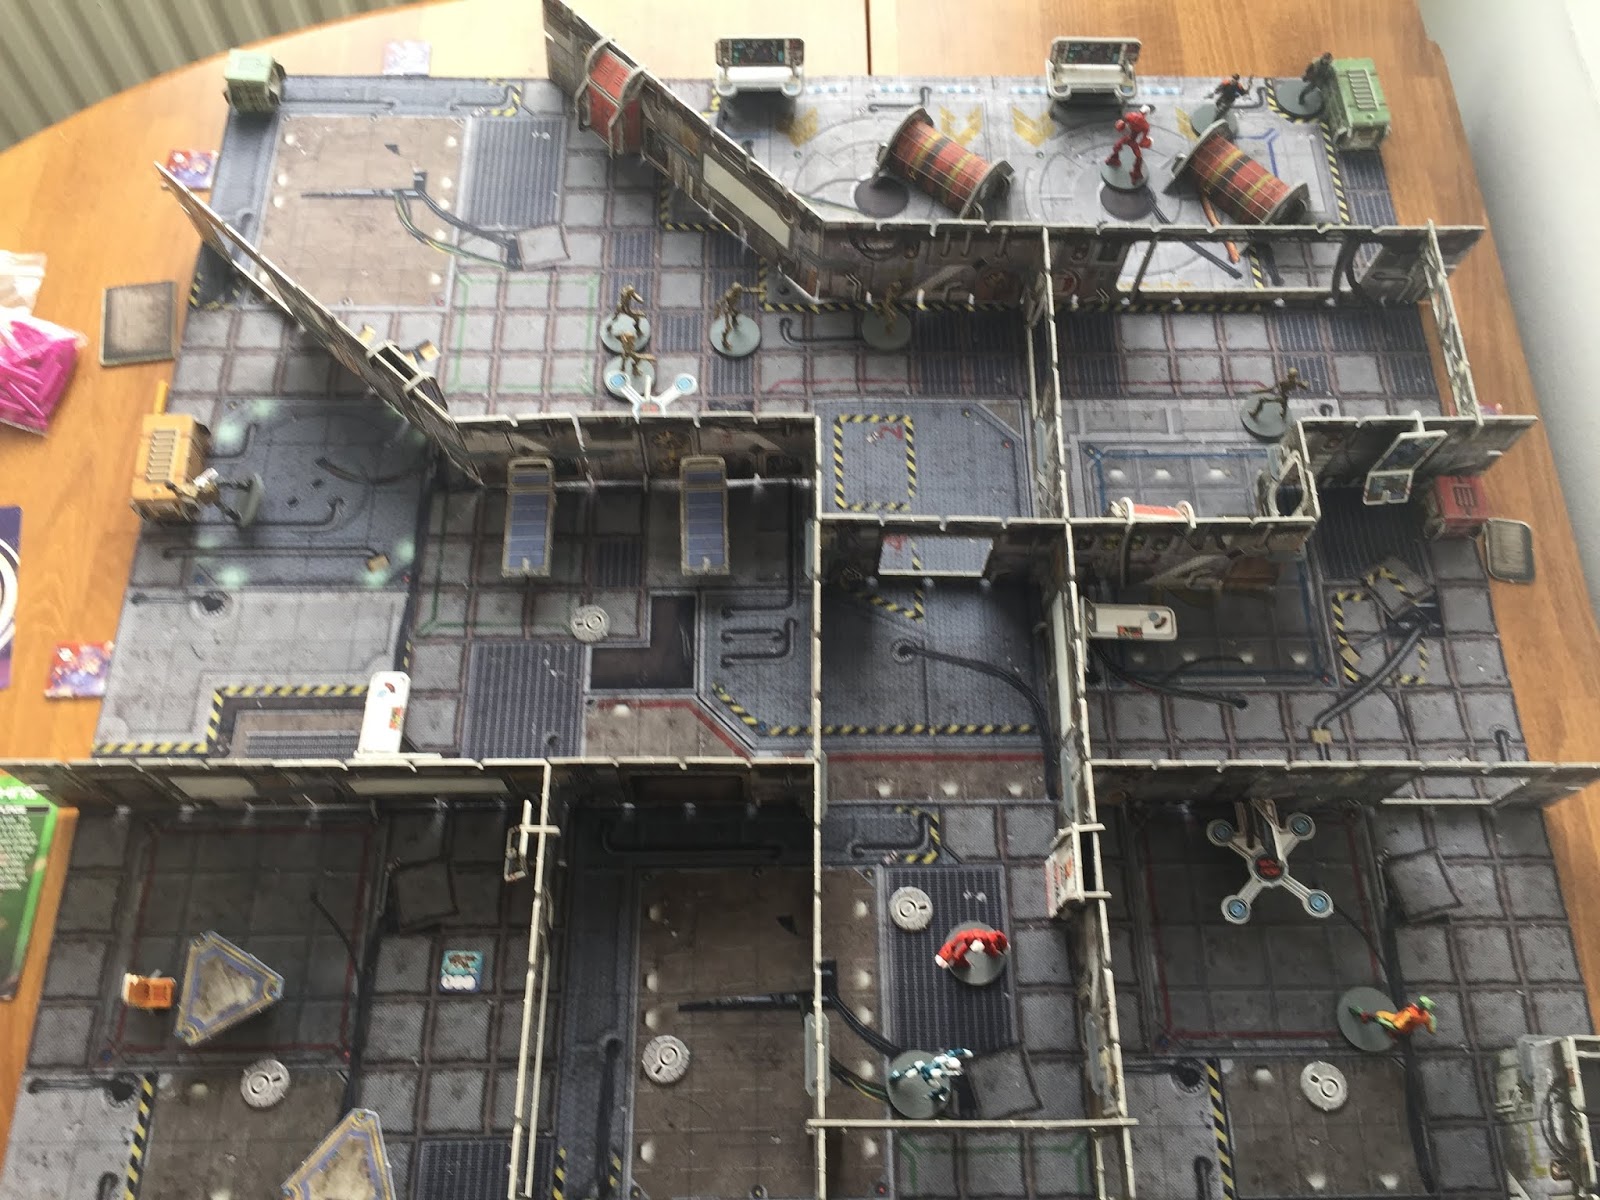
End of Round Overview.

ROUND THREE
The environment card affects energy weapons being fired - but I have none so that's fine!

Jace moves to the crate and searches it - finding Ship Parts!

Lars searches another crate and finds a nice looking Sniper Rifle - and the other Ship Parts!

Renton knows a Devastator is closing on him but won't be able to attack this turn. He backs off and moves into cover. The Devastator does indeed close in on him, while another enters the board to give him more problems to worry about!


End of Round Overview.

ROUND FOUR
My crew are at full health and ammo so the Supply Cache is of no benefit.

The ship parts located, Jace pushes his luck and makes two move actions. For this mission only, ! results on the Combat Dice will steal 1 point of Health - but he gets away with it!

Lars' luck holds out too as he surges forward. It's at this stage that I realise there is another door that the Devastators could have used to get to him. Instead of opening the doors as I go, I may open them all up for future games as my eyes are not to be trusted!

Renton decides he will make a Ranged Assault.

The first shot fired this round increases the threat tracker

He fires 2 rounds which gives him 3 Combat Dice - 2 hits takes out the Devastator!

He then backs up to search the large crate for more loot!

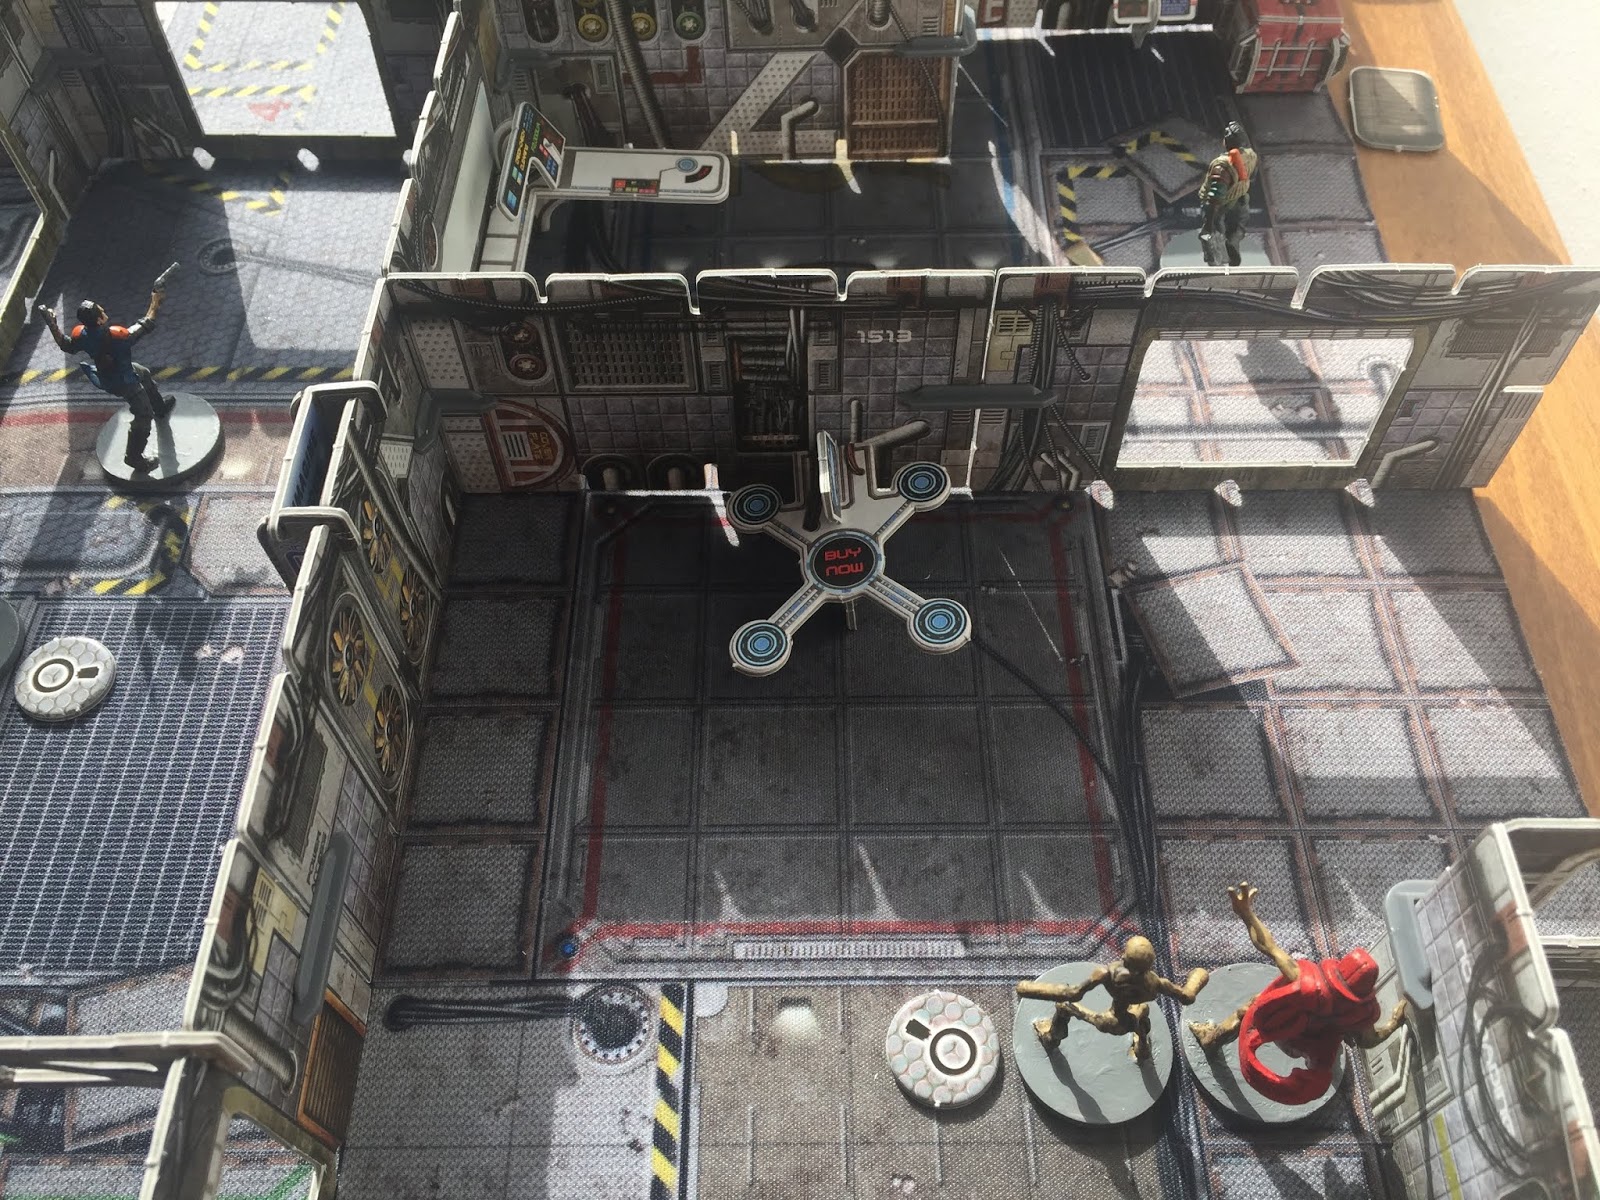
But another Devastator and a Harvester enter play - and sneak right up on the unsuspecting Renton! The Harvester only receives one action so can only Move 4 squares/inches.

He's behind you!

Finally, the other Devastator engages Lars but cannot attack due to those linked Move actions.

End of Round Overview.

ROUND FIVE
All hell breaks as the Event Card prevents me from taking anything more than a Single Action! Not what I needed this Round! On top of that, all models lose one health because of the increase on the Hostility Tracker (as per scenario rules).


Jace Moves onward while Lars has nothing to fight with! I consider all of the options and decide doing nothing with Lars is the least damaging option.

I decide Renton will have a go at fighting the Devastator even though I need that double hit to kill - to no avail! I could have used that Health to restore him back to three (his limit) but I feel ok about him facing the Devastator with three Health.

The Purge suddenly spawn all over the place! A Live One enters play and closes in on Lars before making a Ranged Attack, scoring a massive three hits!

But Lars is engaged by the Devastator so the Chance dice is rolled to see which one of them takes the hits - it's the Devastator! The Live One just did Lars a huge favour!

The Assassin rushes forward, pursuing Jace!

The Devastator makes two Close Assault Attacks on Renton. The first misses!

The second scores a hit!

A Harvester attacks and scores two hits - I spend Renton's skill point to use his Reflexes Action, nullifying this attack!

Another Harvester scores a hit!

And the last defeats Renton!


End of Round Overview.

ROUND SIX
Last Round the Event Card was a killer but this one is a thriller - Kill Code that Live One!

Note that I confirmed with the guys at Battle Systems about Line Of Sight in Core Space - even though miniatures are illustrated in the book as facing their opponents for LOS, it is assumed that your characters have a 360 degree line of sight and therefore can target enemies in any direction (provided usual LOS rules apply, i.e. you cannot draw a LOS through blocking terrain).
Lars runs like hell as the Live One screams in outrage and agony as it dies a hideous death!

He makes it to one of the generators!

Jace also pushes on. Neither suffer any Health loss on the rolls.

The Assassin chases Jace!

While the Civilian draws the attention of the Devastator and the Harvesters - providing the Traders with some breathing space!

And kill the Civilian without mercy!

End of Round Overview.

ROUND SEVEN
I have to make rolls to ensure the Traders don't fall Prone due to the Event Card but thankfully they pass the rolls!

Jace moves out of the Assassin's Line of Sight and makes use of the Effortless Action to move into contact with a generator! He then performs an interact action to bring the generator online!

Lars also performs an interact action to bring the other generator online! The power is up and running and the pair can return to their ship, as the airlock now open! Lars considers taking a shot at the Assassin who now has him in its sights but he decides retreat is the better option!

While more of the Purge close in!

Another Civilian enters the fray! (My other two Civilians miniatures were hidden at the bottom of a dice bag but they shouldn't have been!)

End of Round Overview.

ROUND EIGHT
A Biohazard results in Lars losing two skill pegs...

I think twice about trying to take on the Assassin. Even with the extra burst, I need to roll 3 hits. I decide to go for it! The first roll brings up two hits - no use!

The second one does it though!

Whew!

Jace moves into position to deal with the Devastator that is closing in on them!

Another Assassin enters play. Both he and one of the Devastators head right for the Civilian!

There are plenty more for Jace and Lars to deal with though!

End of Round Overview.
There are plenty more for Jace and Lars to deal with though!

ROUND NINE
I couldn't find any reference to what Augmented characters are so I assumed I didn't have any and the Hostility Tracker remains as is.

Jace takes out the Devastator without fuss!


Then moves over to the crates.

Lars opens the crates and takes a weapon and some armour which he puts on before using an effortless action to move a single square. There's a nice gun waiting for Jace next turn!

Out of shot, the Assassin and the Devastator engage the Civilian but are unable to attack - and neither is he!
Another Devastator enters play and the Harvesters close in on the remaining Traders!

ROUND TEN
The event card allows Jace and Lars to make a free attack - much welcomed!

Jace fires! Two hits!

And the Harvester is destroyed!

Lars fires at the other Harvester but one hit isn't enough!

Lars makes a run for it. Luck holds up with the double move, no health loss! As does Jace - and again, luck holds out!


But they are surrounded!
A Harvester attacks - and takes a point of health from Jace! The other misses! A civilian enters play and swaps a knife with Jace for a basic pistol. The knife might be important!


End of Round Overview.

ROUND ELEVEN
Event Card provides more equipment but the priority now is to get the hell out of here! The increase in the the Hostility Tracker robs them of another vital point of health!


Jace has little choice but to make a run for it...allowing two free attacks on him! The first hits!

As does the other - he's defeated!

Lars makes a bolt for it - those skill pegs would have come in handy to hide from the Purge!

He can't outrun the Assassin though!

It doesn't hesitate - and Lars is slaughtered! Game over!

EXTRACTION PHASE
Just for fun, I ran the Extraction Phase.
First of all I needed to find out if they were dragged off by the Purge - thankfully the rolls are ok and none were!
Secondly, I can't mount a Rescue Mission because all three characters were Defeated. Things seem fairly likely to go wrong with the Emergency Teleport so I try You're On Your Own instead.
Jace is Apprehended! The cops demand a 2UA fee.
Renton is also Apprehended but released without charge and sent back to the ship.
Lars escapes! Must have been that stealth technology at work!
I decide to leave things there as there is no Advancement to be had and anything else seems like unnecessary admin for a team without prior experience who loused up the whole mission!
CLOSING REFLECTIONS
First of all, never - ever - forget to give your characters weapons! That said, I'm not sure that was the reason I failed the mission; all of the characters picked up weapons during the game so they were ok on that front, albeit there are better weapons out there.
Turn 5 proved to be a huge moment. My relative inexperience - this is only my second game - meant that I was too relaxed about Renton's situation. I should have ignored the weapons crate and had him reunite with Jace and Lars in the centre of the board to cover them. That might have made a difference.
Losing a point of health every time the Hostility Tracker increased a level was extremely punishing as this meant all characters lost two Health overall without even being attacked. Factor in that things could have been worse had I not been as fortunate when my characters made double moves which could have taken more health, and the only conclusion I can make is that an experienced crew is required for this one!
The main thing that I've taken from this mission is that the Purge are far more formidable opponents than I first gave them credit for. The Harvesters and Berserkers are managable but Assassins are difficult to destroy and Live Ones nigh on impossible!
Both of the missions I've played so far have been played solo - and this scenario was designed to be played this way. I think that once two teams are involved in missions, co-operative play is going to be essential to both players to survive!
I think I've got a good enough understanding of the rules to try out the campaign - I just hope my team fares better next time! The mission was good fun even though it ended in disaster!
I think I've got a good enough understanding of the rules to try out the campaign - I just hope my team fares better next time! The mission was good fun even though it ended in disaster!


This went as well as my first attempt at Campaign Mission 1 - purge and dead civilians all over the place, and all my crew defeated. Was great fun!
ReplyDeleteLook forward to reading more reports, especially some two player ones as I'll only be playing solo so interested to read how it differs when there's another person involved.
To make up for the lack of another player, I've thought about incorporating some rules from Five Parsecs From Home, as in that crew can decide to leave between missions, feuds can develop between characters, and things such as permanent injuries can occur, so plenty of unpredictability!
Hi Spikey, feedback like this is very encouraging and much appreciated so thank you for taking the time to comment!
ReplyDeleteTo be honest - and you'll know yourself the rules encourage this - I believe co-operative play is going to be key to succeeding in missions so I don't know if 2 players will offer a large advantage over a single player running 2 crews co-operatively.
What 2 player play will introduce is that additional tension of wondering if your opponent gets the chance, will they backstab your crew? That will be a fun element to bring to the game, but I really do think 2 squad Solo Play will be great fun too!
I would be very interested to hear how your sessions go and must admit not being aware of Five Parsecs From Home - googling beckons!
Thanks again!
P.S. After a chat with the guys at Battle Systems, there's an update on this mission at the top of the thread. It might be of interest!
ReplyDeleteMmm, I hadn't considered playing two squads solo, but that could be interesting!
ReplyDeleteExcellent aar! I've been playing for about six months and the Purge is not a joke;
ReplyDeleteAgreed! Sadly I've not had the chance to play Core Space for ages as I've been writing books. I hope to get some play in soon but I'm only halfway through writing my sci-fi trilogy! It may be a while yet. :-/
ReplyDelete