Net Epic Evolution Battle Report: Marines v Eldar 7,000 points
Introduction:
It's been too long since I last played Epic, so I decided it was time to dust off the miniatures and have a game! To ease back into it, I thought a proper old school battle between Marines and Eldar would be a good place to start (particularly as I still remember most of their stats)! I'll be using my Net Epic Evolution rules (also available on this blog) to run the game. For anyone not in the know, the Evolution rules are my own variant of the Net Epic rules which, in turn, are a fan version of 2nd Edition Epic/Space Marine rules by Games Workshop. The main difference is that the Evolution rules enable units to activate, move and fire all in the one moment, rather than Movement and Firing being split into different phases.
A video version of this battle can be viewed below, but the write up which follows provides a more comprehensive report. For the die-hard Epic fan seeking the full experience, why read this post and watch the video? Enjoy!
So without further ado, let's get on with the action!
 |
| Marines vs Eldar! Who will triumph? |
Scenario:
On the red planet of Thryer Aeyandia IV, two mighty armies - Dark Angels Adeptus Astartes and Biel-Tan Eldar - seek to take control of Cohlanga Spaceport!
In game terms, each side has 7,000 points to bring to the table. 60 Victory Points is the target - the first side to reach that threshold wins! Should both sides reach the target on the same turn, the game will be a draw. 8 objectives are placed on the battlefield, each worth 5 Victory Points once captured. Additional Victory Points are won by breaking enemy formations.
Army Lists:
The eagle-eyed among you will note that some of the costings are different to those shown in 2nd Edition Space Marine. That's because I'm using the Net Epic costings which are better balanced than the original costings (though still not perfect). For those who may be interested in army construction, I've split the armies into Companies/Hosts, Support Cards and Special Cards.
Dark Angels:
 |
| Dark Angels 7,005 points |
Land Raider Company: 700
Devastator Company: 1000
Attack Bike Squad: 225
Marauder Squadron: 350
Thunderbolt Squadron: 250
Vindicator Squadron: 150
Deredeo Dreadnought Squadron: 100
Warhounds (one w/2 Inferno Guns, other w/2 Turbolaser Destructors 500
Reaver Titan w/power fist, combat head & 2 Gatling Blasters: 430
Warlord Titan w/2 Volcano Cannon & 2 Quake Cannon: 900
Total: 7,005 points
 |
| Biel-Tan Army 7,000 points |
Battlefield Overview & Set-Up:
The dusty hilly plains of Thryer Aeyandia IV are pot-marked by meteors which should help forces on both sides of the conflict. There are three distinct areas of interest: the fuel depot, the spaceport and the planetary defence base. The top of the picture represents the northern side of the battlefield where the Eldar will deploy, while the Marines will deploy to the south at the bottom of the picture.
 |
| Overview of Battlefield and Deployment (Warhounds not placed correctly!) |
 |
| The fuel depot |
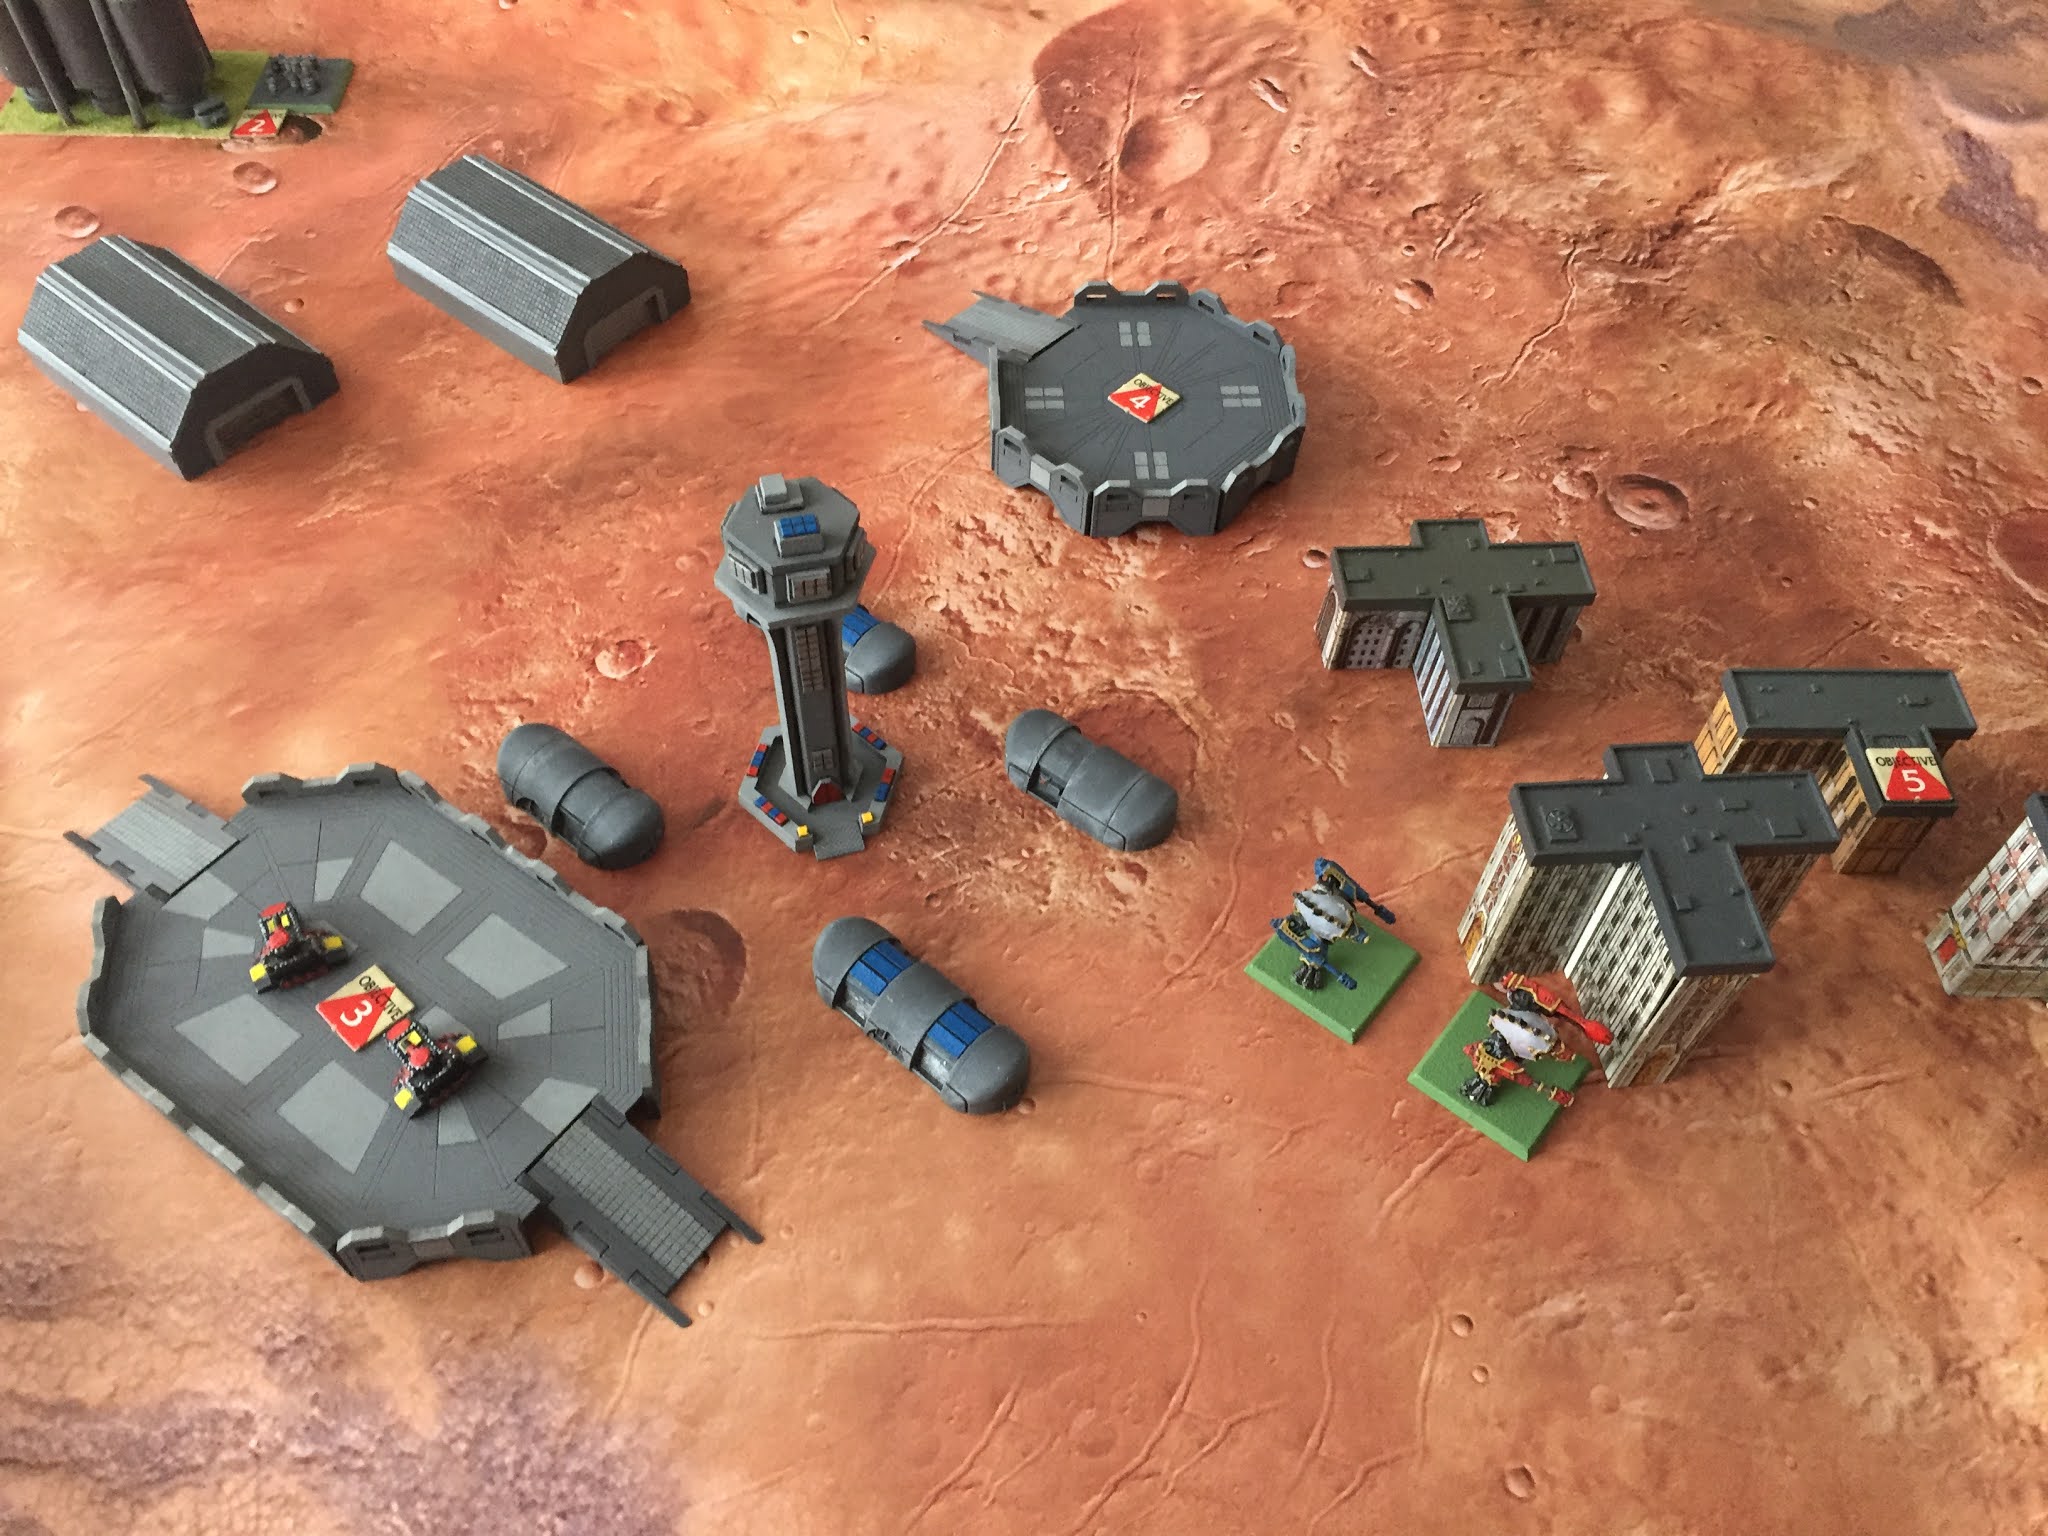 |
| The Spaceport |
 |
| Planetary Defence Base |
The Battle Plan:
Dark Angels: The Marine plan is to concentrate their forces on the south-west corner of the battlefield, hoping to dominate that flank. A serious amount of firepower can be brought to bear: a Devastator Company will be backed up by the might of the Land Raider Company and a whopping four Titans! The Reaver Titan has been provided with a close-assault head and power fist to engage the Eldar Titans in close combat while the Warhounds have specialised to wipe out either infantry or enemy tanks. Finally, the Warlord is armed up with Volcano and Quake Cannon to rip superheavy tanks apart and take down enemy Titans! The Terminator Company have been tasked with securing both landing pads, while they have Marauder and Thunderbolt Squadrons to ensure air superiority! An Assault Company in Drop Pods is held in reserve to cause mayhem behind the Eldar frontline while Ravenwing will try to spot opportunities to ambush enemy formations and support the frontline where required.
Note that the pictures shown are done so from left to right and that the Warhounds (not pictured due to an error!) deployed either side of the Thunderbolt squadron.


Biel-Tan: The Eldar plan is to counter some of the Marine might with their own heavy firepower, namely their Dark Reapers, the Spirit Host, two Companies of Grav-Tanks, Tempest and Cobra superheavy tanks and their Titans. The Warlock Titan in particular has been set up as a Titan-killer with Psychic Lances which ignore Void Shields and automatically inflict damage to an enemy Titan's head! The Phantom and Revenant Titans should prove highly efficient at stripping enemy void shields or as tank-hunters. Much of the Eldar force will try to outmanoeuvre the (marginally) less-mobile Marines by stealing objectives on the eastern side of the battlefield before encircling the concentrated Marine force. Close combat specialists are ready to cut a bloody swathe through enemy infantry and cavalry, but they will seek to avoid tanks, Titans, and the fearsome Terminators! They hope to contest the skies with their Nightwings and counter the Dark Angels' Ravenwing with their own Jetbike Host, but in both fronts the numbers are not on their side. The backline will also have to remain vigilant to deal with any threat from the Marine drop-pods!


Both sides have plenty of work to do to win! With forces picked and plans drawn up, there is only one thing left to do: let the carnage commence!
Turn 1:
Initiative: Eldar win Initiative and force the Marines to activate first.
Action Phase: With most units charging forward, there aren't too many exchanges of fire in the opening moments of the turn.
First blood goes to a Wraithlord who, having mounted a ridge manages to pick off a Land Raider in the valley below. With Wraithguard leading the way, the Warlock also advances over the hill and casts an Eldritch Storm to impede Warhounds and other Imperial units. Vindicators respond with their withering fire almost wiping out the Warlock's Wraithguard entourage to leave him vulnerable to attack! Jet Bikes seize the opportunity and jump the Vindicators before a squad of Terminators divert from their original plan to gang up on the Bikes!
A Warhound strides forward and uses its double Inferno Gun to clear several Guardians off the smaller landing pad! The Harlequins are fortunate to have remained just out of range but must be concerned about a follow up attack next turn!


The first of the Revenants moves forward but a snake eyes results sees both of its Pulse Lasers miss the Warhound miserably! Its missile launcher does better, picking off two Deredeo Dreadnoughts off the ridge!
A Cobra pops up from behind the ridge and targets a building full of Devastator Marines - and destroys it, killing the troops inside!


The Warhound moves up on to another hill to unleash its Turbolaser Destructors at the Revenant - four hits! One misses due to the holo-fields, while the others hit a Pulse Laser, the head and legs! The Pulse Laser is destroyed and the legs damaged, meaning the Titan is in danger of the legs snapping if it moves too fast! Fortunately the head armour soaks up the other attack - and in the End Phase, the leg does not snap!

The second Revenant advances and also fires upon the first Warhound with the Inferno Guns, stripping its shields and a third hit rebounding off the Titan's head! The Missile Launcher misses the remaining Dreadnoughts.

Marauder Bombers streak across the sky and their Lascannon and Missiles obliterate five Grav Tanks! Their Battlecannon, targeted at the powerful Cobra tanks prove less effective, completely unable to crack the thick armour of the super heavies!


Another unit of Grav-Tanks surges forward and Dark Reapers spill out, launching volleys of their Missile Launchers are the nearby Reaver Titan and a Land Raider! The Titan only loses a single Void Shield but one of the Land Raiders is destroyed!


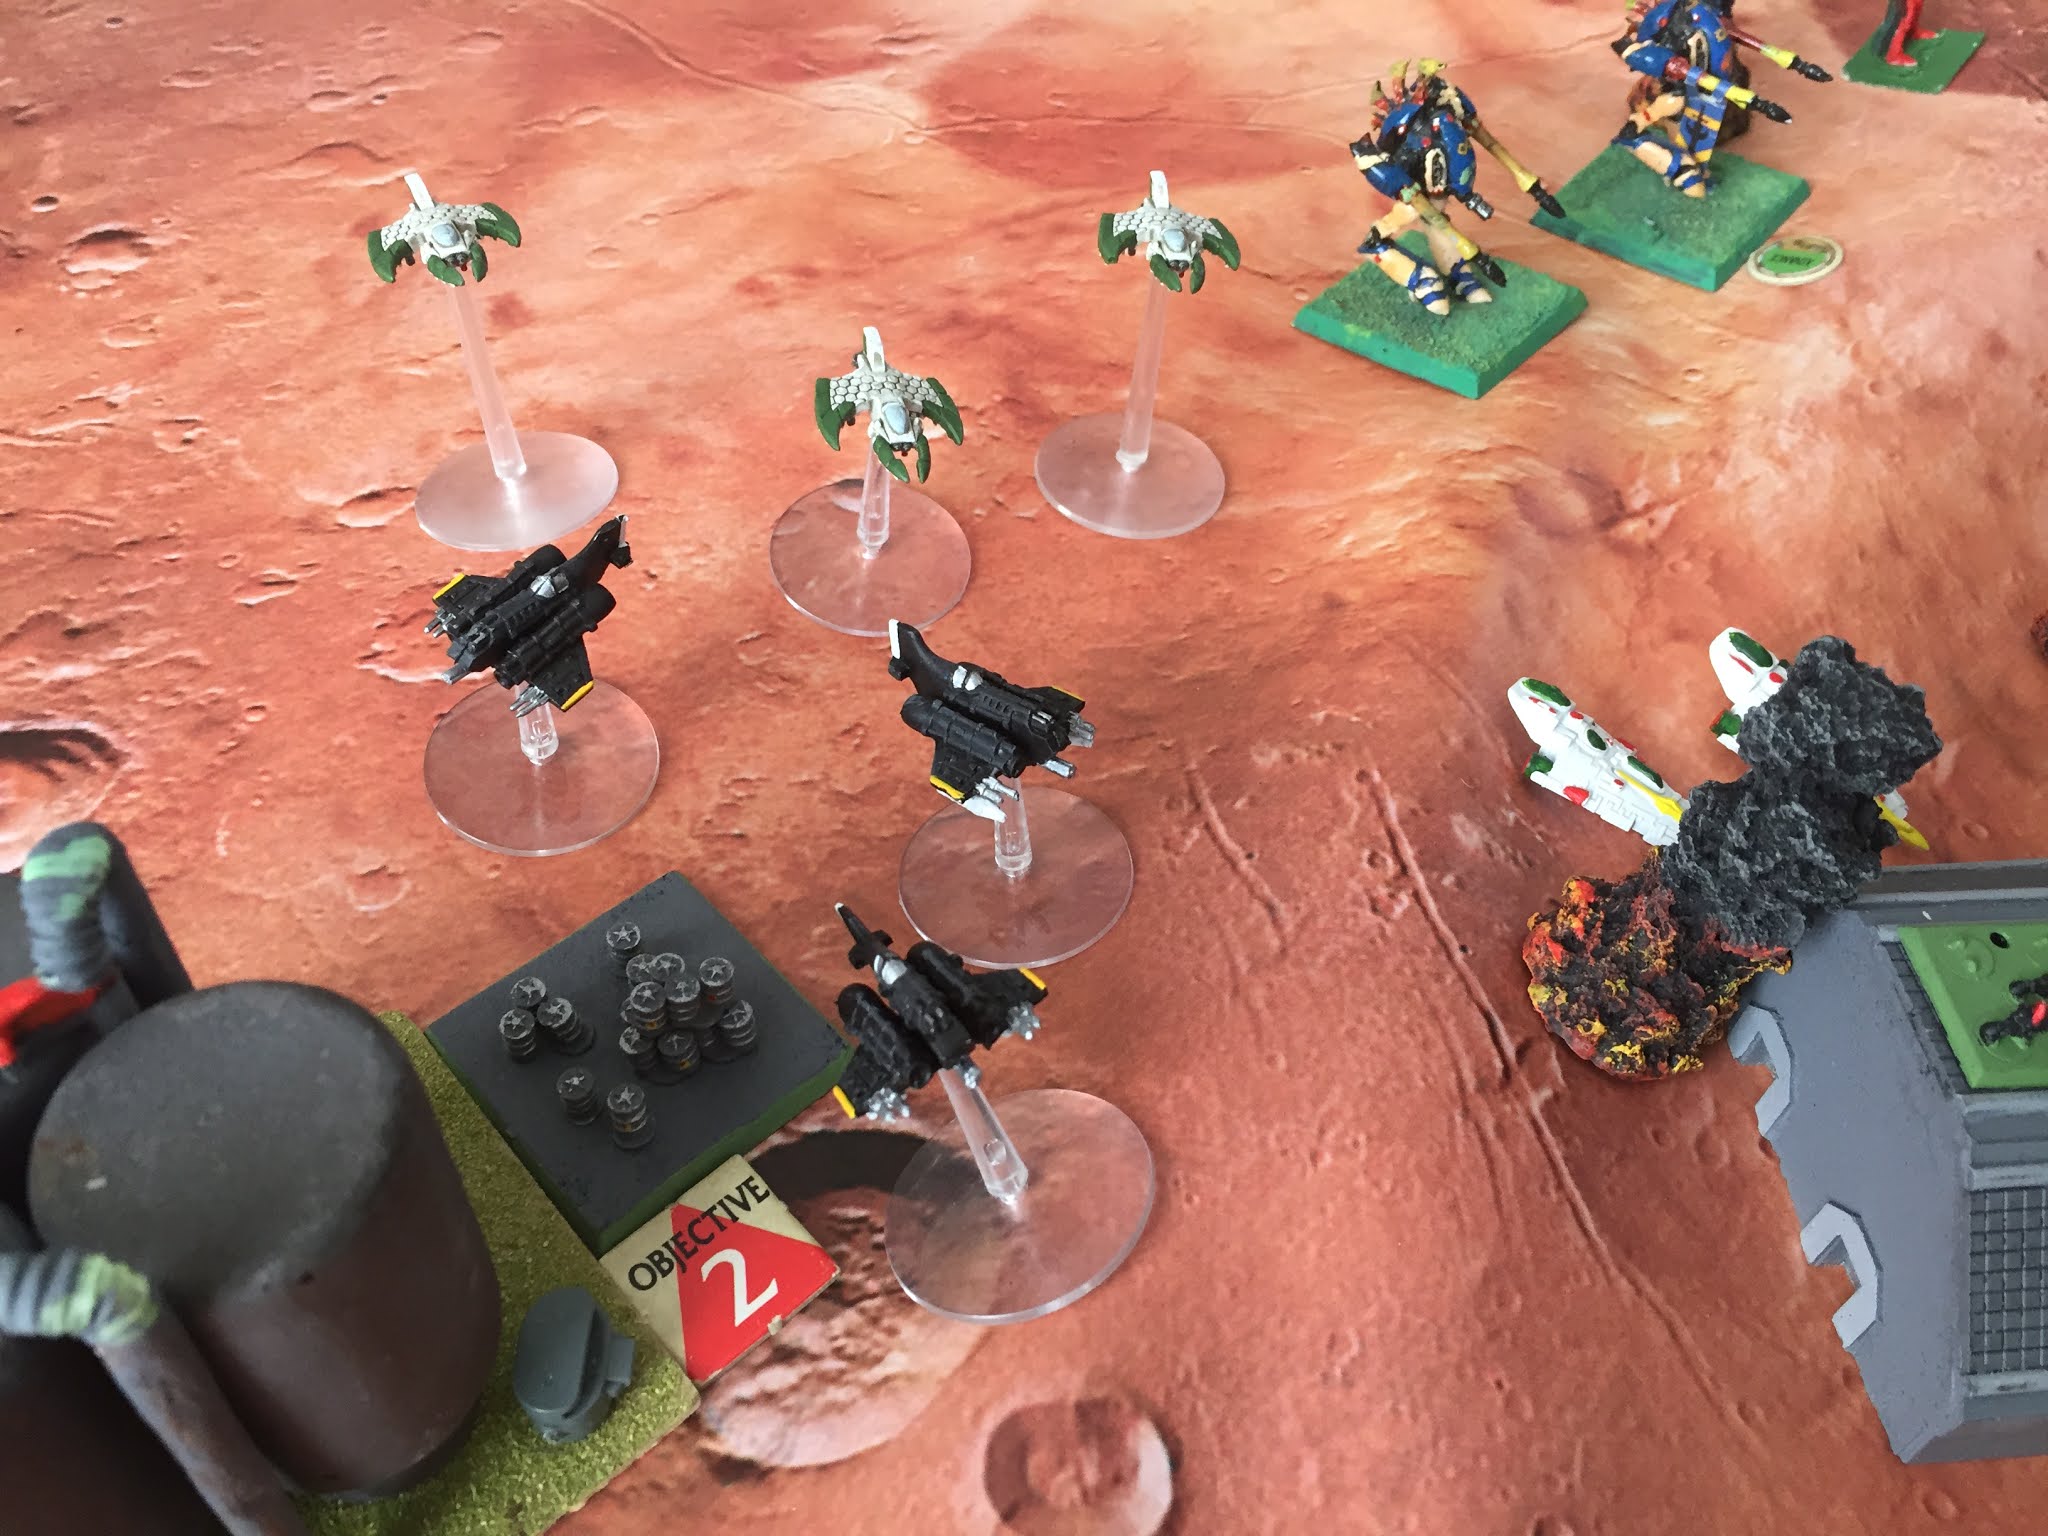
Thunderbolt Fighters are next, and cut down three stands of Striking Scorpions, two Vyper Jet Bikes and another Grav Tank!


Nightwings respond immediately - and focussing all of their weapons on the Thunderbolts, annihilate the squadron!

The Warlord Titan is the last of the Dark Angels' activations - and its Volcano Cannon make short work of two of the Nightwings, while the Quake Cannon obliterates a hangar, wiping out a squad of Dark Reapers in the process!


The Phantom Titan focusses its energies on the Marauder Bombers, taking down two of them, while the second Cobra finishes off the last of them!


Tempests target the Warlord Titan and knock down five Void Shields, while the Warlock Titan charges forward, hoping to make use of it's Psychic Lance next turn!

Close Combat Phase:
Swooping Hawks attack Rhinos with underwhelming results!


Land Speeders jumped the dangerous Wave Serpents who threaten to disrupt the Terminators next turn...and sweep them away!


The Howling Banshees utter piercing psychic screams - but the Land Speeders are unmoved! It is a moot point, however, as the close combat specialists tear apart the Land Speeders! The lone survivor was not engaged by them!

Eldar Jet Bikes engage Vindicators and a lone Devastator stand...


...and deal with them with ease! Unfortunately, Terminators arrived as backup...

...and the Jet Bikes pay a heavy price!
The Reaver Titan swings its Power Fist at a building where Guardians are taking cover...


...and tears it to the ground! The Guardians suffer a horrible end as the building crashes down upon them!
End Phase: The Warhound and Warlord Titans recover a single Void Shield each.
Overview: The Marines have seized 2 objectives (#1 on the fuel depot, extreme left out of shot, and #5 in a building on the periphery of the spaceport), while Eldar have seized 6 objectives (#2 in the fuel depot, #3 on the large landing pad - Swooping Hawks stole it! - #4 on the small landing pad and #6, #7 and #8 on and around the planetary defence base).

Overview (clockwise around the board, Marines viewpoint to Eldar):


Marine Casualties:
Thunderbolt Squadron: 3 VPs
Vindicator Squadron: 2 VPs
Turn 1 VP Total (awarded to Eldar): 9 VPs

Eldar Casualties: (Note that the final Nightwing was added to this after failing its Morale Test and exiting the board - some welcome good news for the Marines!)
Wave Serpent Squadron: 2 VPs
Striking Scorpions: 2 VPs
Dark Reapers: 3 VPs
Swooping Hawks: 2 VPs
Turn 1 VP Total (awarded to Marines): 12 VPs

End of Turn 1:
Eldar: 39 VPs
Turn 2:
Initiative: Marine player wins Initiative - and acts first!
Action Phase: Acutely aware of the Warlock Titan is bearing down up on it, the Warlord strides forward until it has a bead on the Phantom Titan (still treated as on First Fire orders from the previous turn) and the two Revenants!

It uses the Quake Cannon on burst mode to ensure that the Revenants' holo-fields cannot cause the shots to miss! The badly damaged Titan takes another hit to the head, fails the armour save - and takes maximum damage! The Revenant teeters on the spot before crashing to the ground! The other finds one of its Pulse Lasers is damaged!

The two Volcano Cannon seem to have found their mark - but one misses due to the holo-fields! The other is a bullseye, though! It punches a hole directly through the Phantom's head and causes maximum damage, destroying it! As it crashes to the ground with an earth shattering boom, it misses crumpling upon nearby Tempests by a whisker! If this is the Warlord's last action in the game, destroying two Titans is going out in style!

Thirsty for revenge, the Warlock Titan strides forward and targets Terminators with its Missile Launcher, two Land Raiders with the Lascannon and the Warlord and Reaver Titans with a Psychic Lance apiece!

Two Terminator stands perish beneath the barrage, while one Land Raider is obliterated...

...the Psychic Lance hits the Reaver but only causes light damage! Even still, the Titan will require to make a roll of 4+ if it is to activate this turn!

The other Psychic Lance also hits! The Titan staggers backwards before falling - K.O.! Inside the Titan's head, the minds of its princeps have been fried! Vengeance is sweet!

Another Titan - the Warhound with Turbolaser Destructors - activates and targets the remaining Revenant Titan! Two shots find their mark beyond the holofields, but one ricochets off the head armour!

The other destroys the Revenant's holofields! Vulnerable to incoming fire, the Revenant responds, but targets the other Warhound with its remaining Pulse Laser and has a whopping six targets under its Missile Launcher - three stands of Devastators and three attack bike stands!

Incredibly, the Missile Launcher contrives to miss all six targets, while the Pulse Laser strips the last of the Warhound's shields and the armour manages to soak up the second hit from the weapon. Only the Scatter Laser succeeds, destroying the last of the Land Speeders threatening the small landing pad!
The second Warhound activates and approaches the landing pad, unleashing the boiling plumes of flame from its Inferno Guns!

Two stands of Harlequins crumple to the ground, howling in agony - but this is a disappointing yield!

Dark Reapers activate and hammer at the Reaver Titan from a nearby ridge, stripping the remaining Void Shields and landing two direct hits!

...but the Reaver's armour is the equal of the Dark Reapers' ordnance! Aware that it is painfully vulnerable, the Reaver activates, planning to engage the Warlock Titan in Close Combat - but rolls a 1, and cannot move or fire due to the head damage! A Cobra pops up and fires at the Reaver - it scatters, but not far enough! Still caught under the template, a hit means automatic damage to the head...

...and delivers the coup de grace! Another Titan falls!

Taking advantage of the brief window while the Cobra tank is still popped up, a Land Raider takes aim at the superheavy tank, as does the Land Raider HQ who, as well as targeting the Cobra, is trying to assassinate the Warlock with the vehicle's Bolter!

The shot does not trouble the Warlock, but three hits are landed on the Cobra! Two simply ping off its armour, but the third punches through - and destroys it!

Wraithlords stride forward to return fire upon the Land Raiders, but their attacks prove futile.

A Land Raider squadron tries to finish off the stricken Revenant, but only manage to permanently cripple it...

Two Grav Tanks pop up to attack the Land Raiders, but their shots prove ineffectual. The Devastators on the large landing pad activate, along with their HQ...

The Swooping Hawks are wiped out, while the Devastators bring down one of the Grav-Tanks, three stands of Howling Banshees and even a Wraithlord on the hill!

Wraithlords activate and pick off a single Land Raider in the distance.

...while Terminators and their HQ activate. The HQ picks off the nearby Jetbike...

And the other two shoot down two more Wraithlords! They need to kill the Warlock though to break the Spirit Company!

The Warlock repositions his Eldritch Storm to protect from incoming Devastator fire - but his and the Wraithguards' shots are ineffective.

A Devastator squad in the buildings activates, firing at a variety of targets in different directions!

They manage to pick off a Harlequin on the landing pad, the last of the Wraithguard protecting the Warlord, a Guardian in the building and a Grav-Tank!

Terminator Land Raiders, including the HQ activate. The HQ surges forward and finally eliminates the Warlock, breaking the Spirit Host!

The remaining Cobra pops up and tries to take out two Terminator Land Raiders - but its D-Cannon scatters and instead sends two Devastator stands on the large landing pad into oblivion!

The Land Raiders on the landing pad respond, targeting the exposed Cobra with extreme prejudice - and obliterate it!

Guardians manage to kill a stand of Terminators...

...while Land Speeders surge forward to open fire on Vyper Jetbikes and a nearby Falcon...

...killing all!

Terminators in the nearby building gun down more Guardians...

...while those in the further building finish off the last Harlequin. Deredeo Dreadnoughts on the distant hill kill the last of the Howling Banshees...

...while, after a series of ineffectual activations, a lone Falcon picks off another Land Raider in the far distance. The Land Raider Company are on the brink of breaking!

Rhinos charge on to the landing pad to steal an objective!

The Avatar closes in - and his spear tears through a Rhino like it was tinfoil!

...another squadron of Falcons moves in from the extreme flank...

...and manages to destroy another Land Raider! Company broken! Jetbikes on the same extreme flank see an opportunity to steal an objective and jump nearby Rhinos!

...Marine Attack Bikes respond - but there is no way to get in at all the Jetbikes! The objective will end the turn contested!

Falcons pop up and try to pick off the two remaining Rhinos on the landing pad!

...but only manage to destroy one! The Rhino is still holding the objective!

A last unit of Terminator Land Raiders push forward and strafe the crippled Revenant Titan - but to no avail as its armour stands up to the attack! Tempests pop up and direct their fire upon the large landing pad in the distance...

...it is a target-rich environment! But, having broken the Land Raider Company, they focus on the Devastators and their Rhinos...

The Tempest Lasers tear up the landing pad, annihilating two Rhinos and three stands of Devastators - company broken!

The battered remnants of the Eldar force look up in dismay as the sky above darkens - and Drop Pods start thudding down all around!
The barrage template indicates the central landing point (this has been scattered twice as per the Deep Strike rules). All Drop Pods land within 20cm of this point, and each Drop Pod scatters...
First to arrive are the Deathwind pods...

...which spring open and spew death to the nearby Guardians! The survivors stare in disbelief...

...as the Support and Assault Pods slam down all around!

Most are successful in opening - and Assault Marines emerge, pistols blazing!

The Support Pods are unable to deal and damage - but the Assault Marines manage to pick off another Falcon - while the last squad of Guardians falls to fire from all directions!

The final activations of Turn Two see the Striking Scorpions rushing forward to plant themselves on an objective. The last of the Marine Attack Bikes and the Master of Ravenwing roar forward to engage them! Can they overcome them or will the deadly warriors be a foe beyond them?

Close Combat Phase:
The Striking Scorpions take down two bikes - but the Master of Ravenwing is one opponent too many! The Marines take the objective!

While the other close combat is between Rhinos, Jet Bikes and Attack Bikes!

The combat is resolved, but decides nothing - the objective is contested!

End Phase:
Overview: The Marines have taken full control of the western half of the board, holding objectives #1-#4 and, thanks to the late entry of the Drop Pods, took objective #8 on the extreme eastern flank of the board. The Eldar held on to objectives #6 & #7 but failed to capture objective #5 which remained contested.

Overview (clockwise around the board, Marines viewpoint to Eldar):


Marine Casualties:
Land Raider Company: 7 VPs
Turn 2 VP Total (awarded to Eldar): 31 VPs
+Turn 1 VP Total (awarded to Eldar): 9 VPs

Eldar Casualties:
Revenant Titan: 3 VPs
Spirit Host: 5 VPs
Falcon Host: 5 VPs
Harlequins: 2 VPs
Turn 2 VP Total (awarded to Marines): 45 VPs

Eldar: 50 VPs


